Resources
Everything you need to know about our product
1. FAQ Section
-
1. Linking HC with shop's Menu.
Follow these steps to link the app with your store's menu.
-
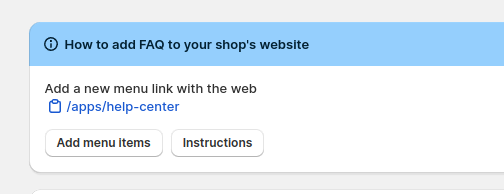
Click a button “Add Menu Item” from HelpCenter settings page:
-
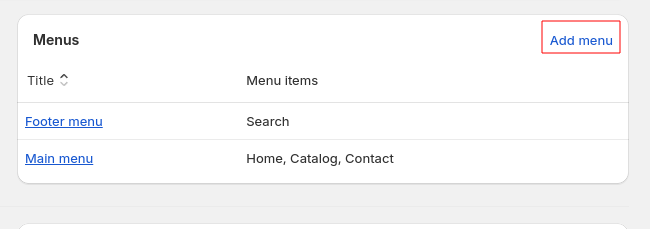
Click Add Menu link:
-
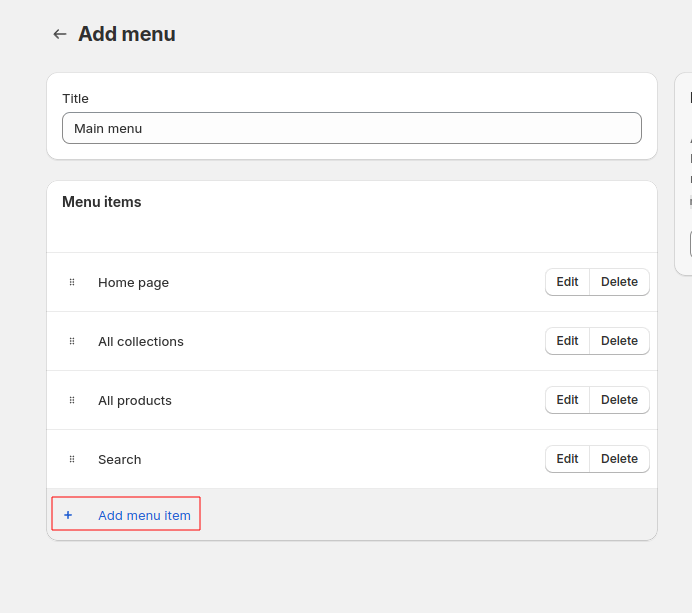
Click Add Menu Item link:
-
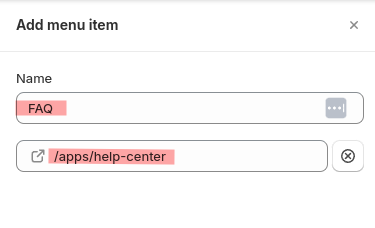
Give menu item a name (e.g., Help Center or FAQ);
Then type /apps/help-center in the link field;
The option showing this link will pop up. Just select it and click add
-
-
2. URL link path change
You can edit the URL link path in the store settings.
Please, follow these steps:
-
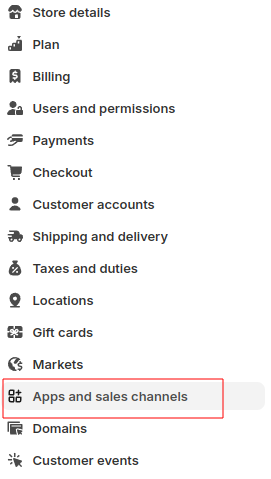
In the Settings, select Apps and sales channels:
-
Find the HelpCenter app and click on it:

-
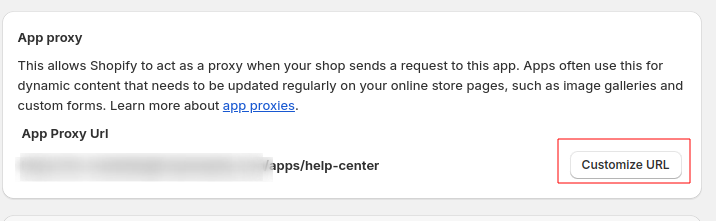
Choose the “Customize URL” option:
-
Select your preferred option from a drop-down menu. You can use apps, a, community and tools for your link path. And enter your preferred name in the text field:
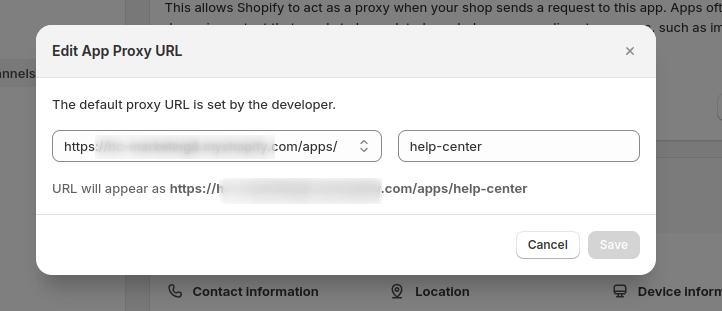
Please note, that when a proxy URL is edited - the menu item link path in a Navigation section must be replaced accordingly.
-
-
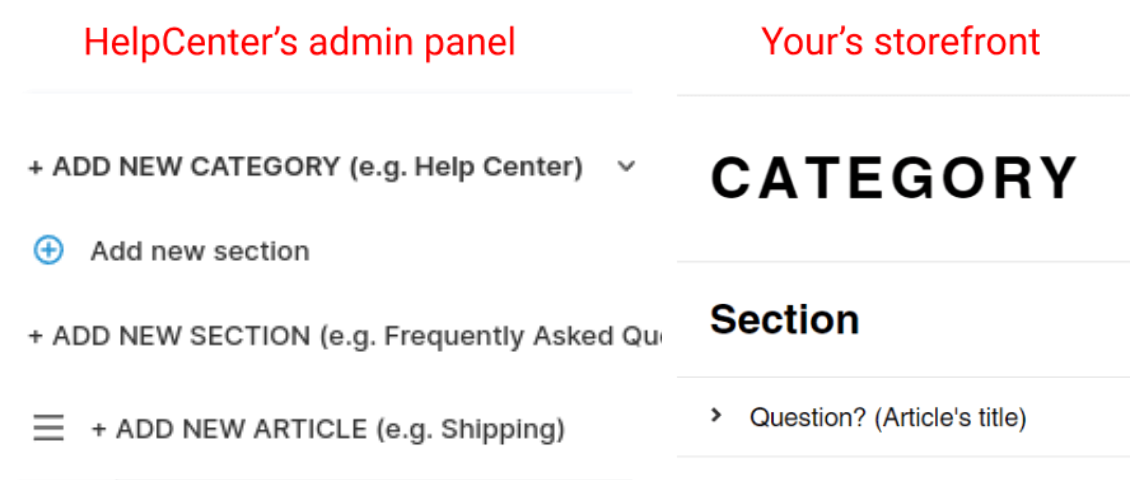
3. Structure of FAQ
The structure of HelpCenter is very simple, and it has 3 layers - categories, sections, and articles. It's important to know that all articles belong to a section under which they were created. If the section is unpublished or deleted, all questions under the section will also be deleted. The same is for the categories, if a category is deleted, all sections and articles under it will be also deleted.
You can always reorganize articles and sections easily - just by moving them around.
-
4. Two layers option
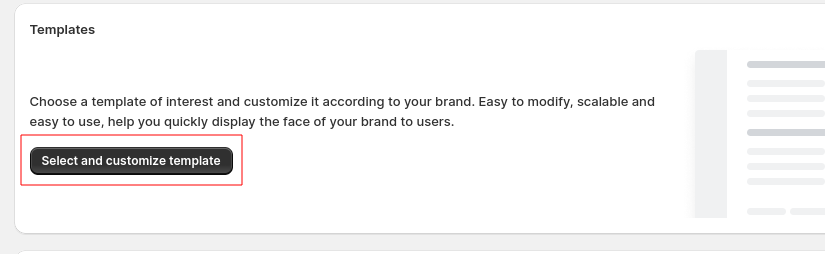
Go to the FAQ section, choose “Select and customize template”:
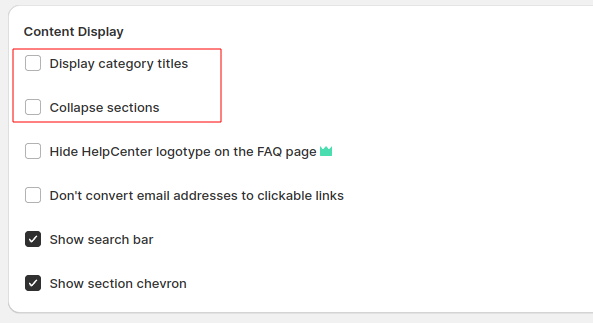
Here, you can find a few helpful options to make the FAQ 2 layer:
“Collapse sections” unchecked - so the content of FAQ would be open by default. “Display category titles” unchecked - so the titles of Category is not visible
-
5. Video adding
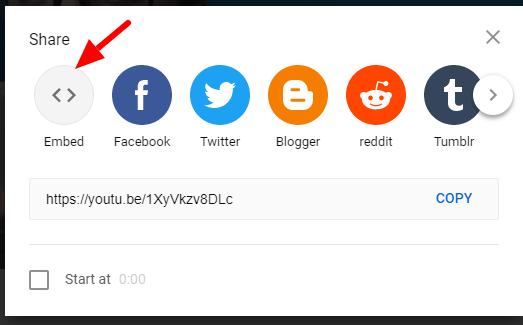
You can add a video to your FAQ page if the video can be embedded from an online source. For example, you can go to YouTube, choose your desired video and click to share:
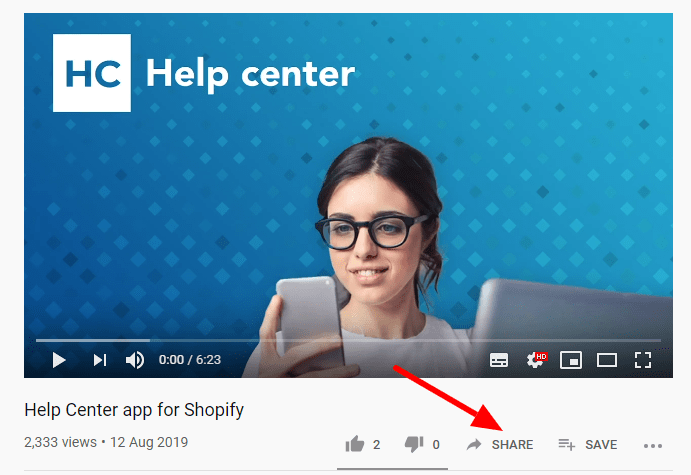
Then choose to Embed:
Copy the code provided:
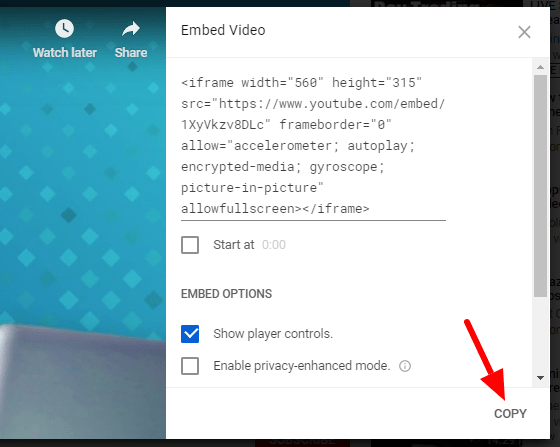
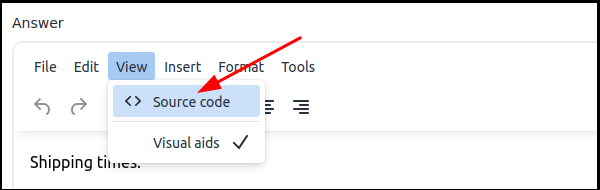
Paste the code in the Article's editor as HTML < >:

-
6. Image adding
To add a picture to your FAQ page, follow these steps:
-
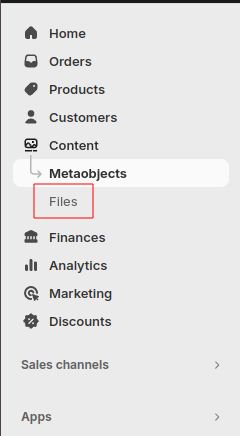
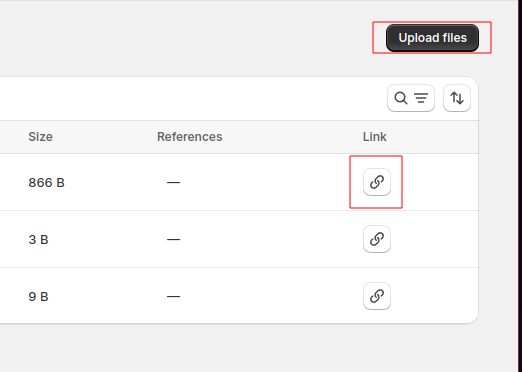
Navigate to your store Content Panel > Files:
-
Upload the image that you wish to use and copy its URL:
-
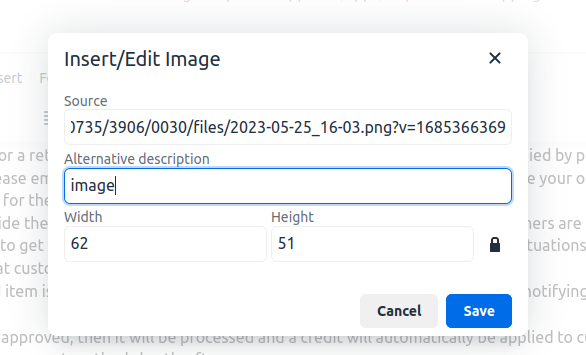
Open the article that you wish to add the image to and click on image icon:

-
Paste previously copied URL address and add a description:
-
2. Help Desk Section
-
1. Main information about the service
-
Ticket. Communication with customers on all channels - email, live chat and social chat - is treated as a "ticket".
-
Used ticket. Tickets are counted as used only when support people send a response or a new email to the customer from Help Desk system.
-
Incoming (received) tickets don't decrease ticket plan resources. If ticket is closed without a response from an agent - it is not counted as billable.
-
If customer writes a new email and agent responds - it's counted as one billable ticket.
-
Once you close the ticket (email) and the customer replies to the same ticket within 3 days, the old ticket will be reopened. If the customer reaches out to you again after more than 3 days and agent responds, a new billable ticket will be opened.
-
Live chat. One chat is counted as one ticket. Each individual conversation with a customer within a single thread is one billable ticket.
-
Auto-responses to the customers from automation workflow are not counted as billable tickets.
-
Switching plans. Upgrading from Monthly to Yearly plan will prorate Monthly plan subscription. Downgrading or canceling an annual plan subscription, all features are suspended
-
7 days FREE trial. First-time HelpCenter users are offered a 15-day FREE trial to test Professional or other plan features. Once the FREE trial is started it will continue uninterruptedly for 7 days. When a user starts a 7-day free trial and chooses Professional or other plans, during the FREE trial it's possible to upgrade/downgrade to any plan user wants and test different features of the HC app. After the FREE trial is over, Shopify billing of the chosen plan:Monthly plan recurring plan payments repeat every 30 days and annual recurring payments - once a year.will be started automatically by Shopify billing system. Monthly plan recurring plan payments repeat every 30 days, annual plan payments - once a year.
-
Uninstalling the app. Communication history with the customers in all channels will be available when app is installed. If the App is uninstalled, Help Desk ticketing service history will be available 48 hours and later will be deleted due to the requirements of the General Data Protection Regulation (“GDPR”) and Shopify webhooks policy, related to GDPR requirements
-
-
2. Set-up guide
We've prepared several on-boarding tutorials for your convenience.
-
Please get acquainted with information in this FAQ part.
-
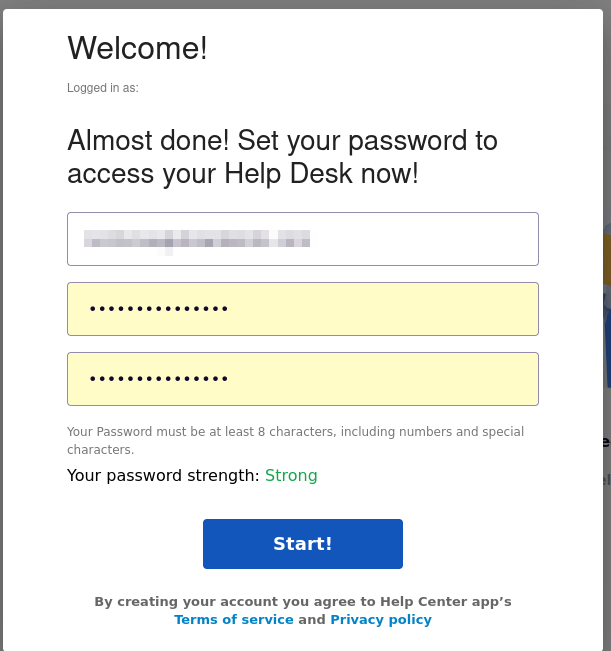
Logging into Help Desk ticketing for the first time, you'll create a first user – Team leader – who will have all permissions to do necessary set-up:
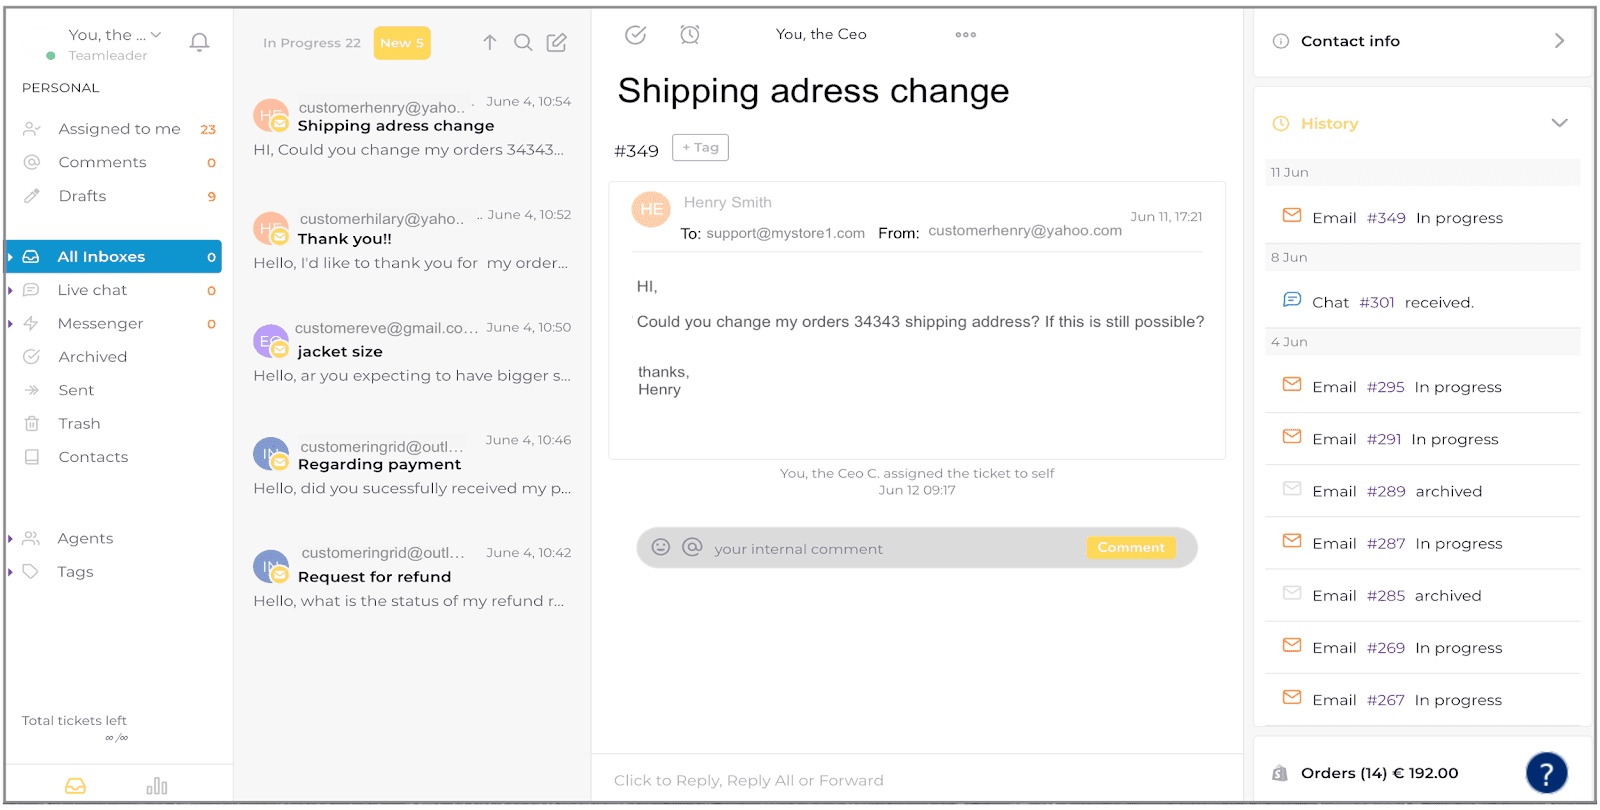
After logging into Ticketing system, you'll be redirected to the main mailbox window:
-
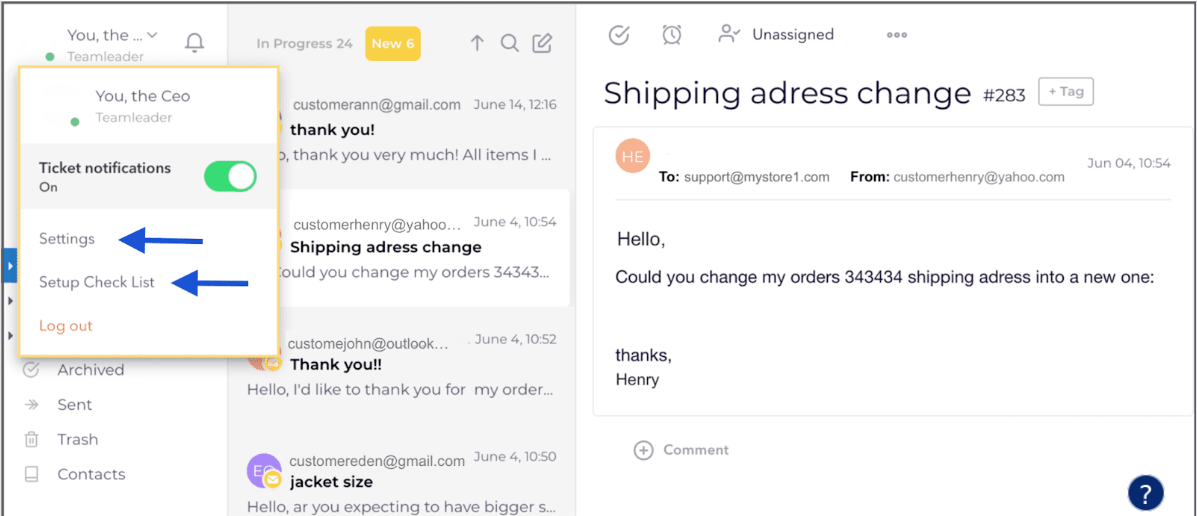
Team leader can add mailboxes to Help Desk, create new agents and assign them to mailboxes, live chat accounts for their daily customer support activities. All this can be done in “Settings” part – second major part in Help Desk ticketing, which you can easily access by pressing on Team leader's icon on the top left and choosing "Settings":
-
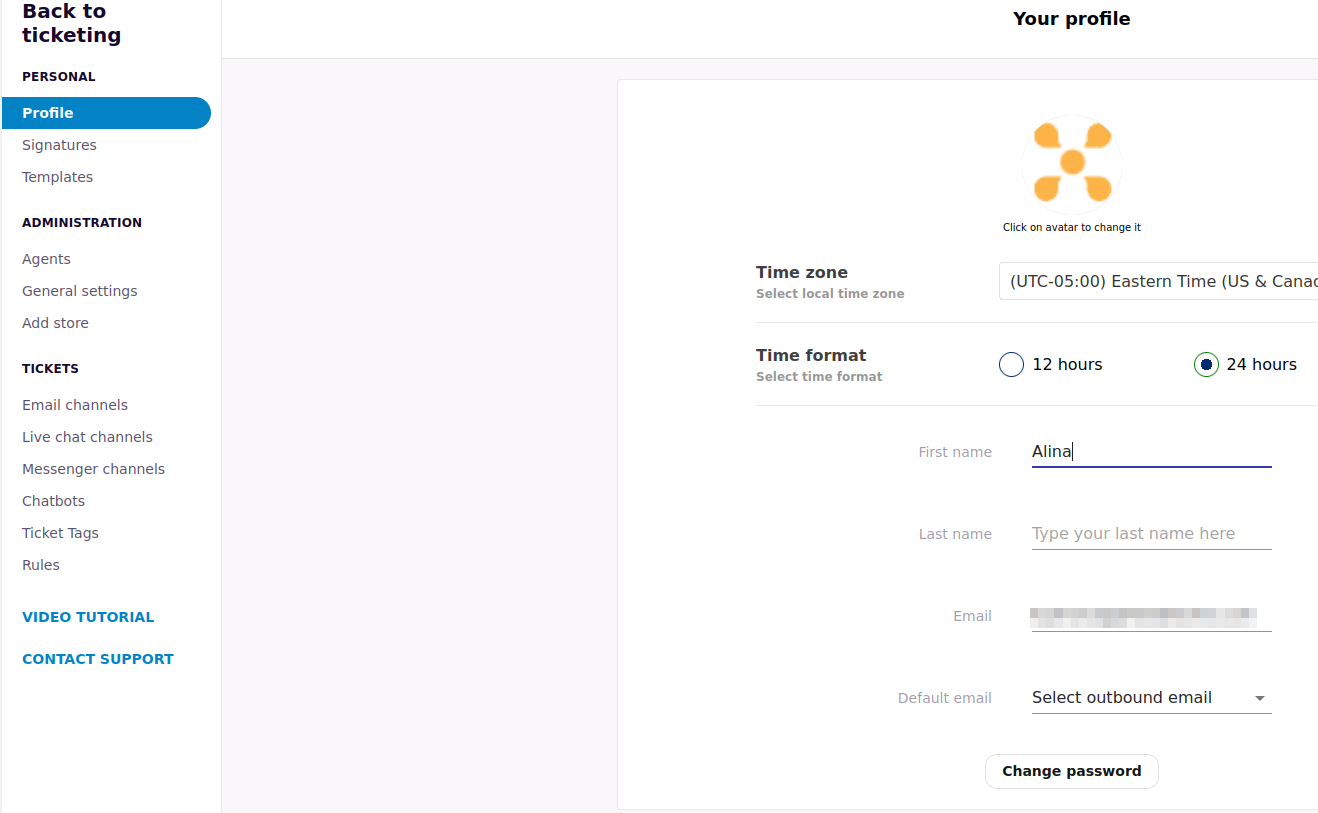
“Settings” part:
-
For the first on-boarding, you can use the tutorial guide, which can be found under the question mark in the right bottom corner in the ticketing system. It will guide you through all major set-up steps.
-
Also, pressing on above-mentioned Team leader's icon on the top left, please find "Set-up Check List". There is all necessary info about major ticketing service features and set-up recommendations with valuable tips.
-
-
3. Unlimited agents
-
You can create unlimited number of users (agents) to work with customers emails, chat, and FB messenger inquiries.
-
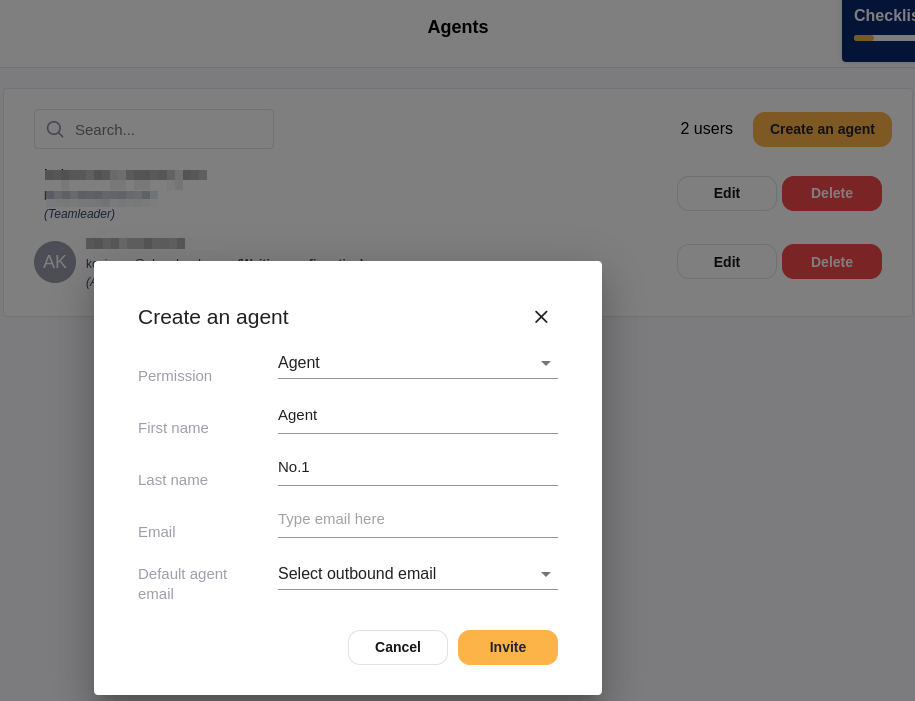
Team leader is responsible for Help Desk account management, creating and assigning roles to agents: Settings => Agents => Create an agent:
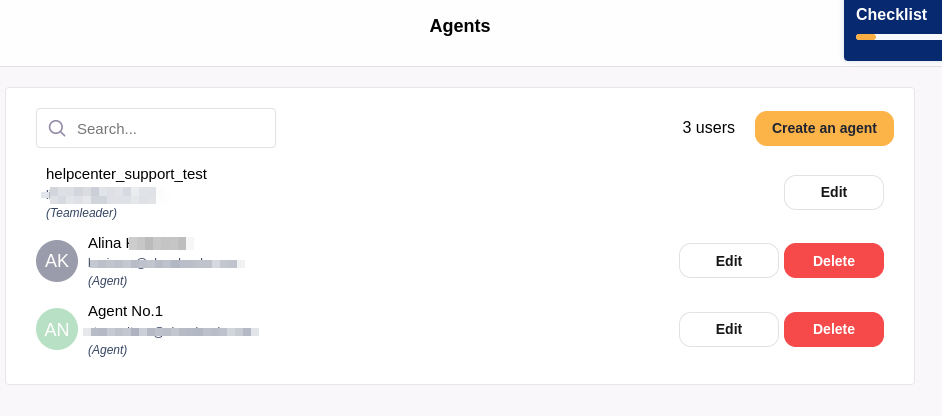
Example list of Help Desk ticketing users:
-
After creating agents and adding mailboxes, live chat, messenger accounts to Help Desk system, please select channels that particular agent will work with (one or several inboxes, chats, etc.): Settings > Email channels, Live chat channels and Messenger channels
-
-
4. Unlimited inboxes
You can add as many email accounts (inboxes) as you need to work with Shopify customers:
-
different emails for supporting different stores
-
bigger stores might need different inboxes for support, sales and other purposes
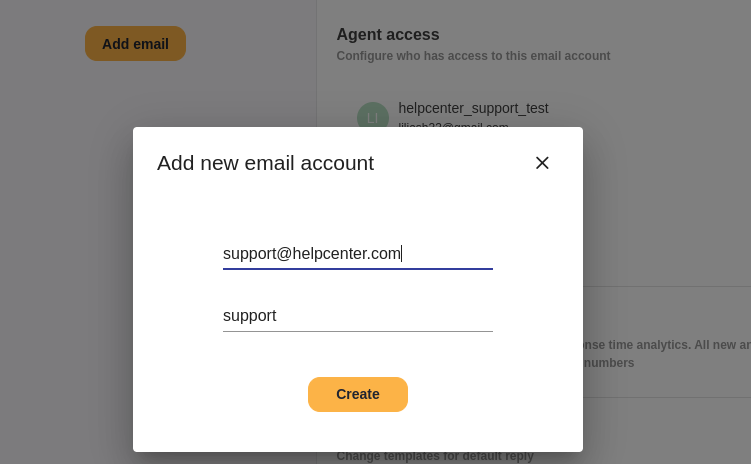
Adding new inbox to Help Desk ticketing:
Settings > Email channels > Add email
-
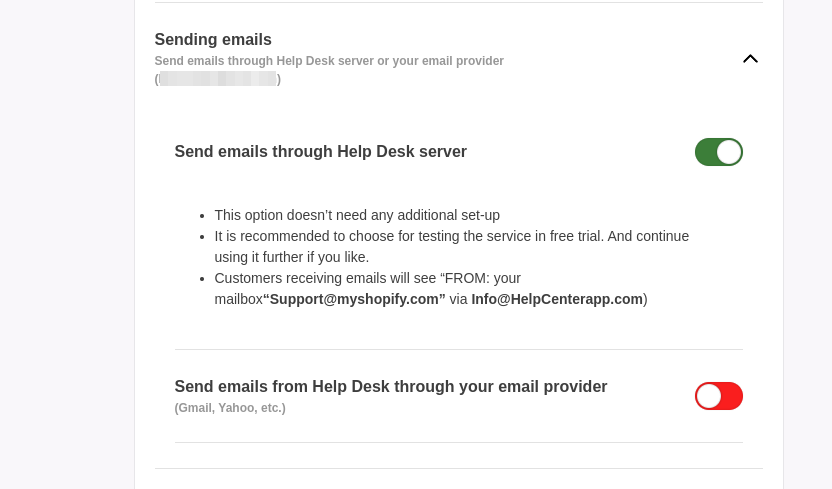
Finalize email receiving and sending set-up in a few steps:
“Sending emails” part has two options:
-
Send emails through Help Desk server. No additional set-up, recommended for free trial and later usage if you like.
-
Through your email provider's server (Gmail, Yahoo, Outlook, etc.). This method needs a few quick SMTP set-up steps.
-
When sending and receiving email set-up is done, systems are connected and all letters that will be sent to your indicated mailboxes will be delivered to Help Desk ticketing system and send to your customers from it.
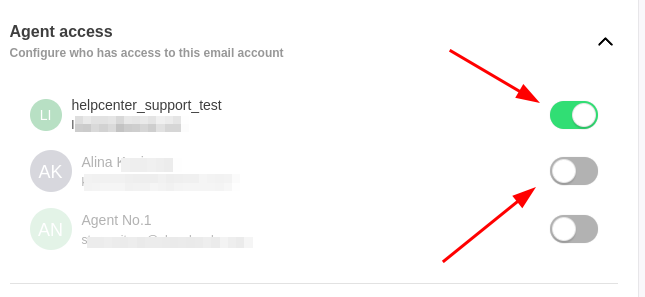
In Settings > Email channels > Agent access part, please assign agent to a particular email inbox or several inboxes to work with.
-
-
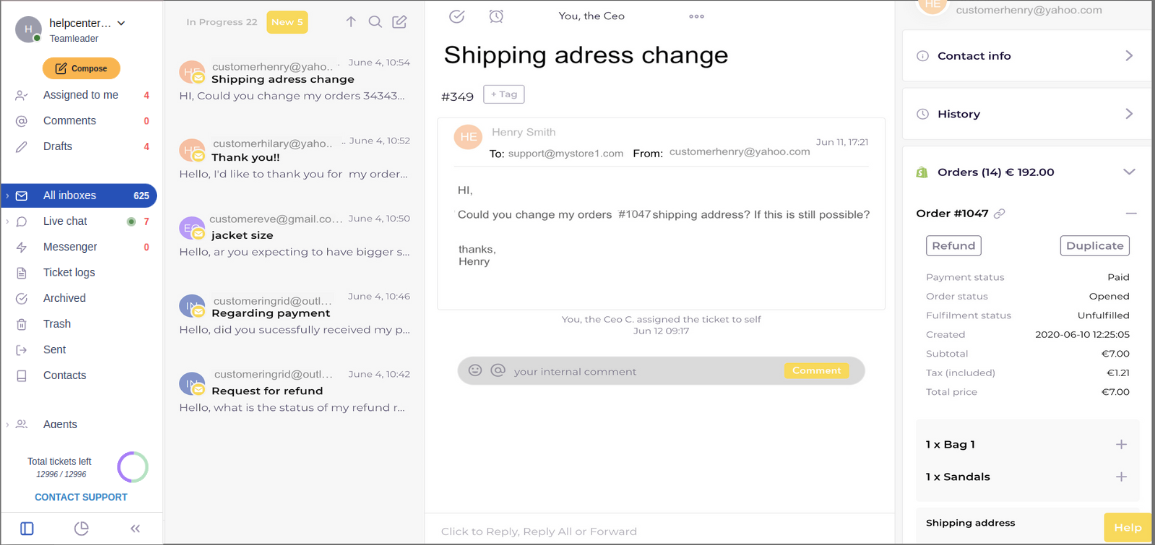
5. Work with inbox part
-
All inbox emails are divided into 3 major statuses:
-
New
-
In progress
-
Archived
-
-
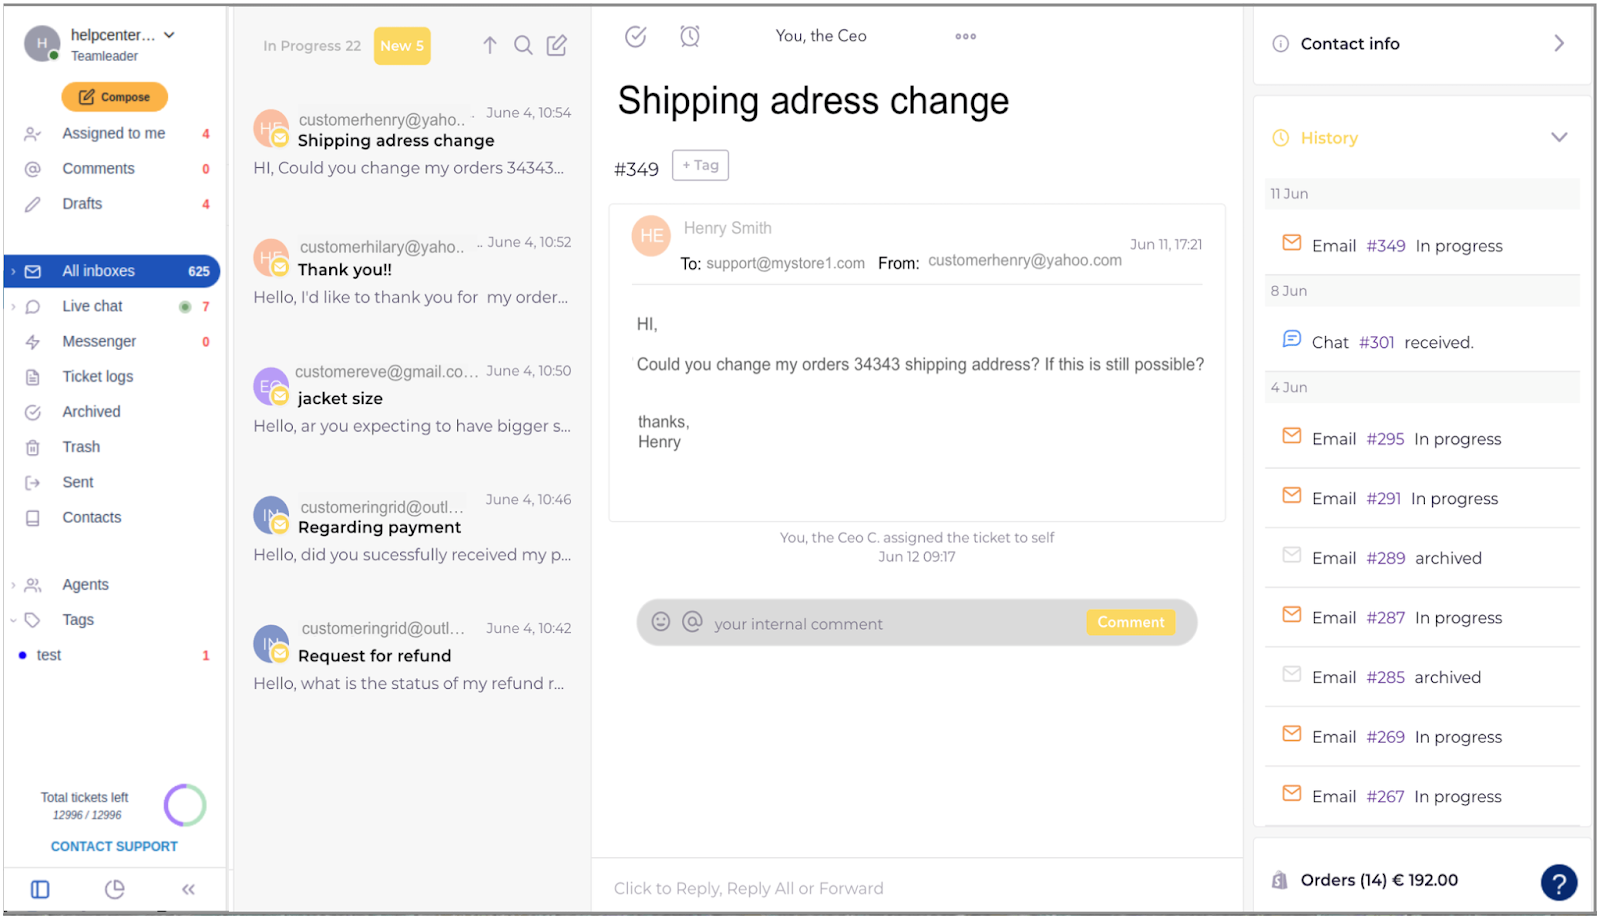
Before working with new email, it has to be assigned to an agent. And one or more tags added if needed (support, sales, refund, etc.)
-
Then standard email features can be used: reply/ reply all/ forward.
-
Agent can leave internal comments in the ticket, also tag other agents in special comments field (@colleague).
-
On the right part of the inbox there is information about all communication history with particular customer: emails, chats and messenger communication. With statuses: new, in progress, archived.
-
After the work with a ticket is done, the ticket should be closed with “Archive” option.
-
"Snooze" feature is used for ticket to disappear from the list and re-appear again under preset conditions
-
-
6. Integration with Shopify orders
Easy access customer orders from Help Desk system:
Possibility to see customer orders history (number of orders, incomes)
Easy one click access from Help Desk to such options as "Duplicate", "Cancel" or "Refund" an order.
Note! Currently, access is possible to 1 store orders
-
7. Filtering and search of tickets
There is a possibility to search and filter all tickets (new, in progress, archived) according to these criteria:
Agents: tickets, where particular agents are assigned
Comments: tickets, where particular agent is tagged
Drafts: tickets that were started, but not finished
All inboxes: all communication channels, that agent is assigned to
Tags: filter out tickets according to most important topics
-
8. Other inbox settings (Signatures, templates, tags, and rules)
-
Signatures: create signatures for different mailboxes Settings > Signatures

-
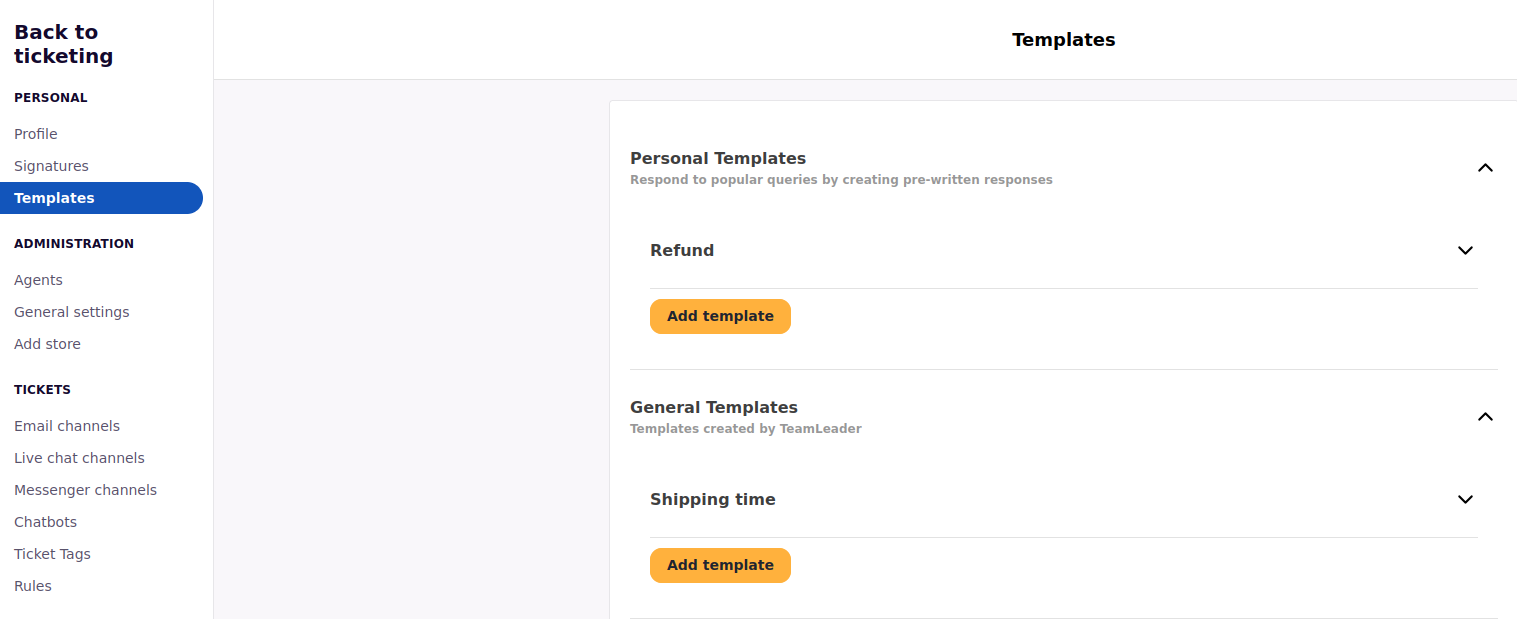
Templates: they help to respond to most popular questions by creating pre-written responses (macros) and easily accessed in one click. Templates might be created for personal or general use:
- General templates are created by Team Leader and can be used by all agents
- Personal templates are visible and used by the agent who created them
- Auto-response templates can be created for default reply when new email is received, or when email is received on “non-working hours”, or when a ticket is solved and archived.
-
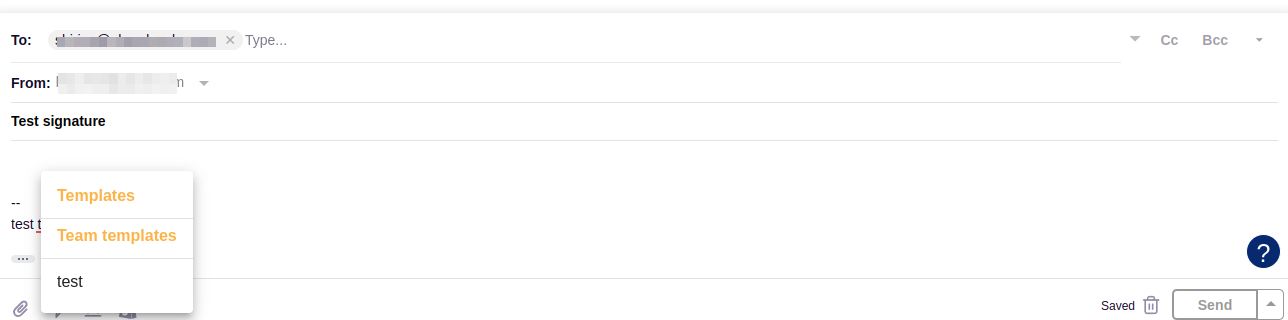
Templates can be selected from the list by agents replying to customer’s emails.
-
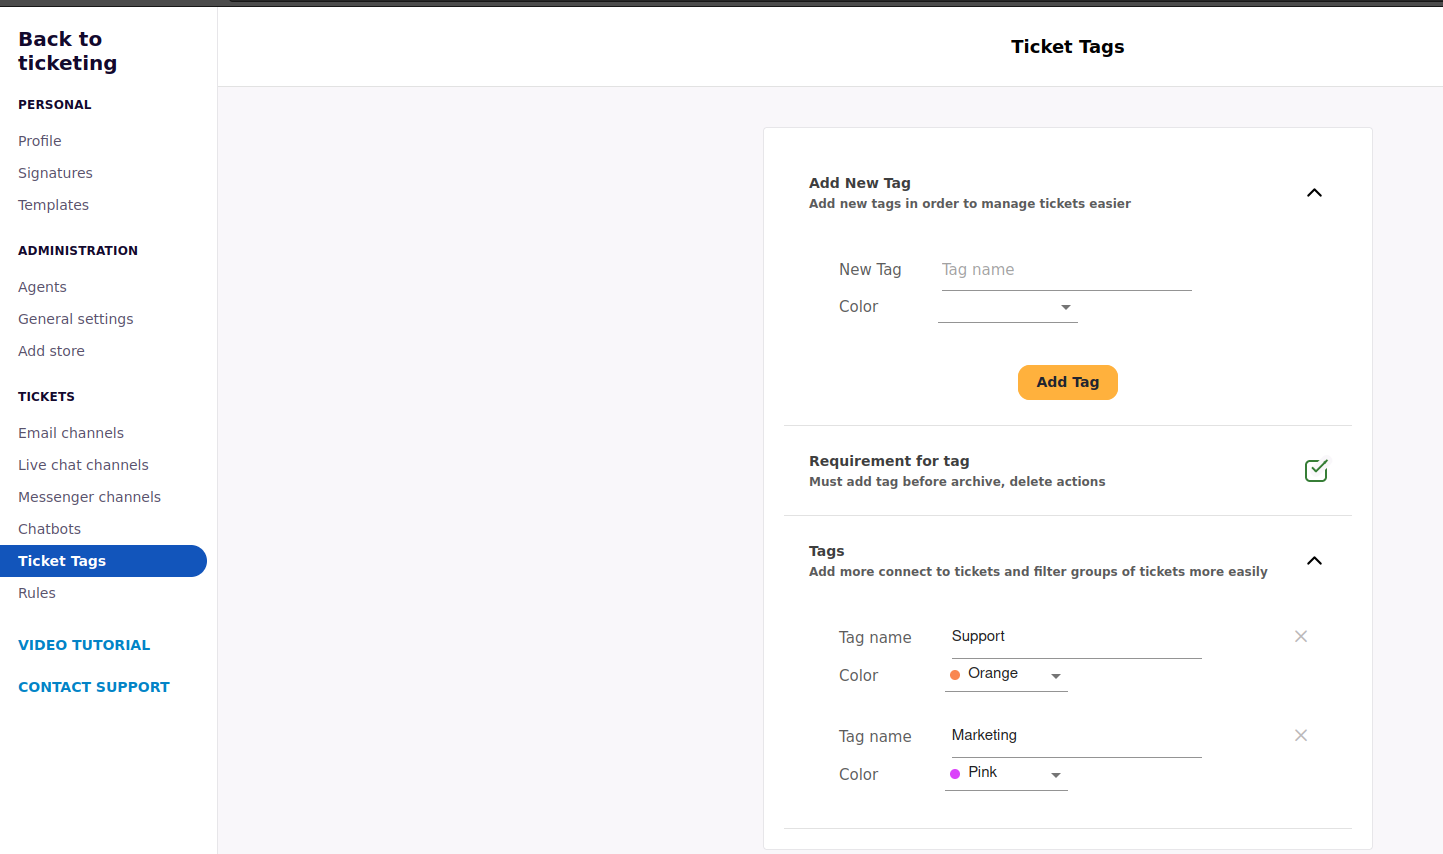
Tags: create different tags for email sorting (e.g. support, sales, information, etc.)
Settings > Ticket Tags
Additional setting "Requirement for tag" might be selected and agent will have to add a tag before archiving or deleting a ticket.
-
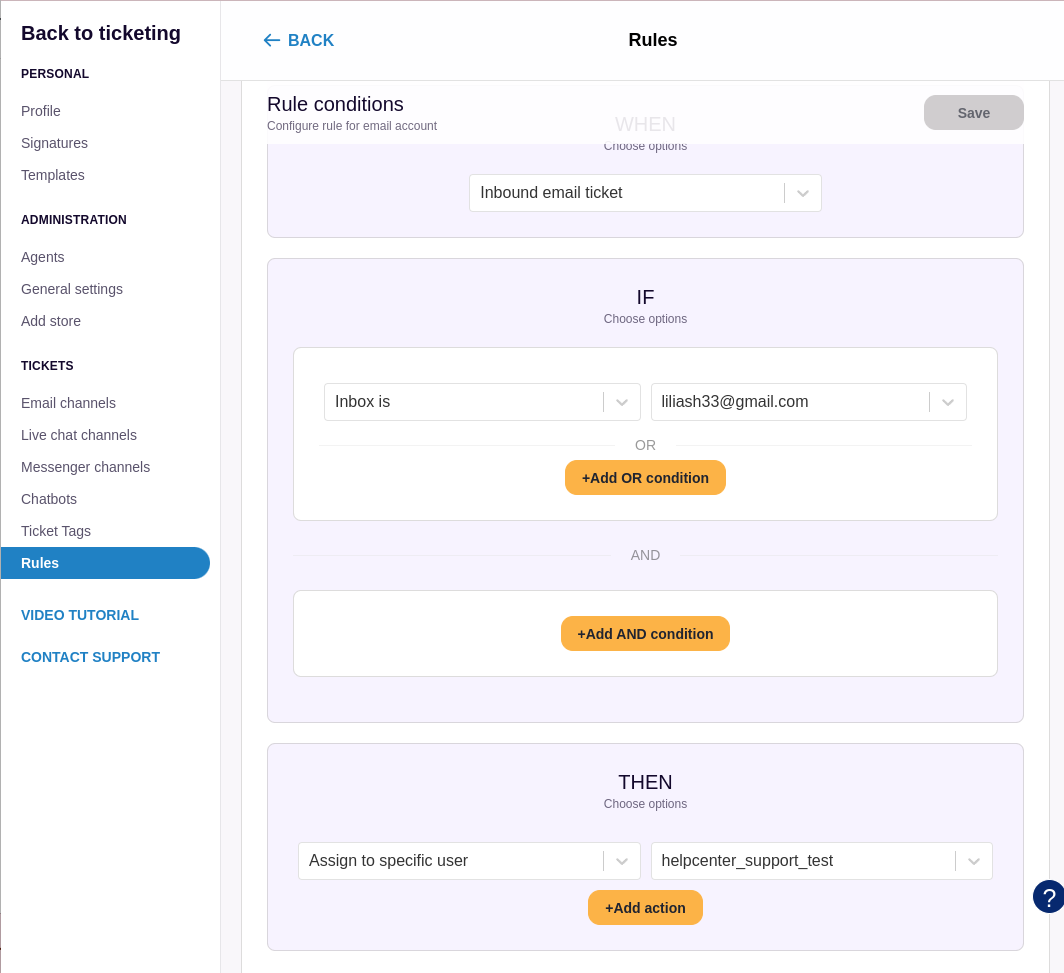
Rules: Rules are used for quality workflow management. For example, you can create a special list of VIP customers, add VIP tag and their tickets will be automatically assigned to VIP support.
Or use Round Robin strategy, then tickets are automatically assigned to active agents in a cycle.
Set rule a name and choose when it is applied in Settings > Rules:
-
-
9. Other email account settings
There are more important settings in Settings > Email channels part - additional features for each inbox:
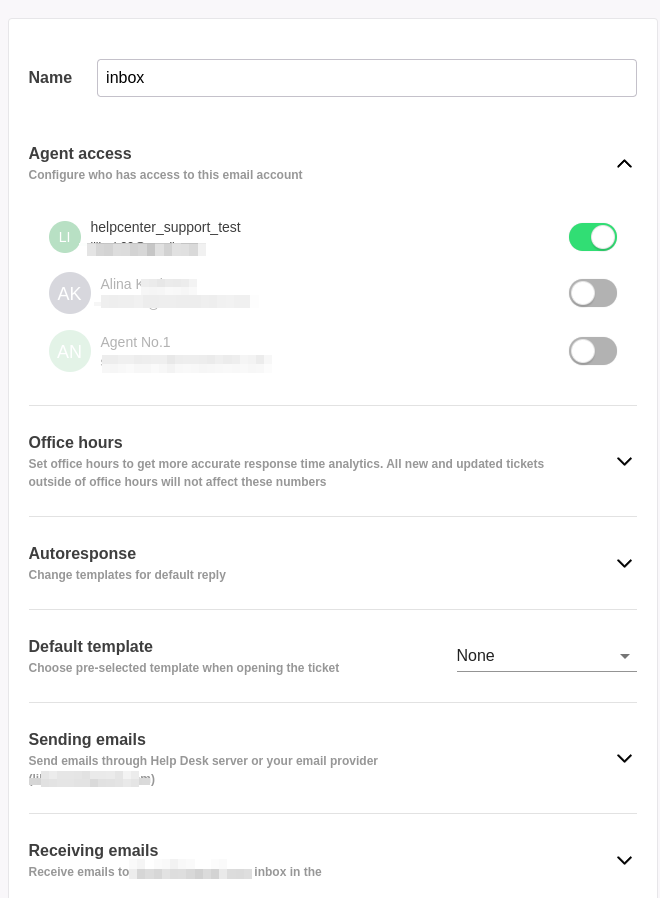
Agent access: for assigning agents, who will work with particular email account
Office hours: set office hours in order to get more accurate response time in analytics part. Tickets received or modified on “non-working hours” will not affect statistics.
Auto-response: add templates for default reply when new email is received, or when email is received on “non-working hours”, or when ticket is solved and archived.
Default templates: can be assigned to particular mailbox.
Receiving emails: settings part.
-
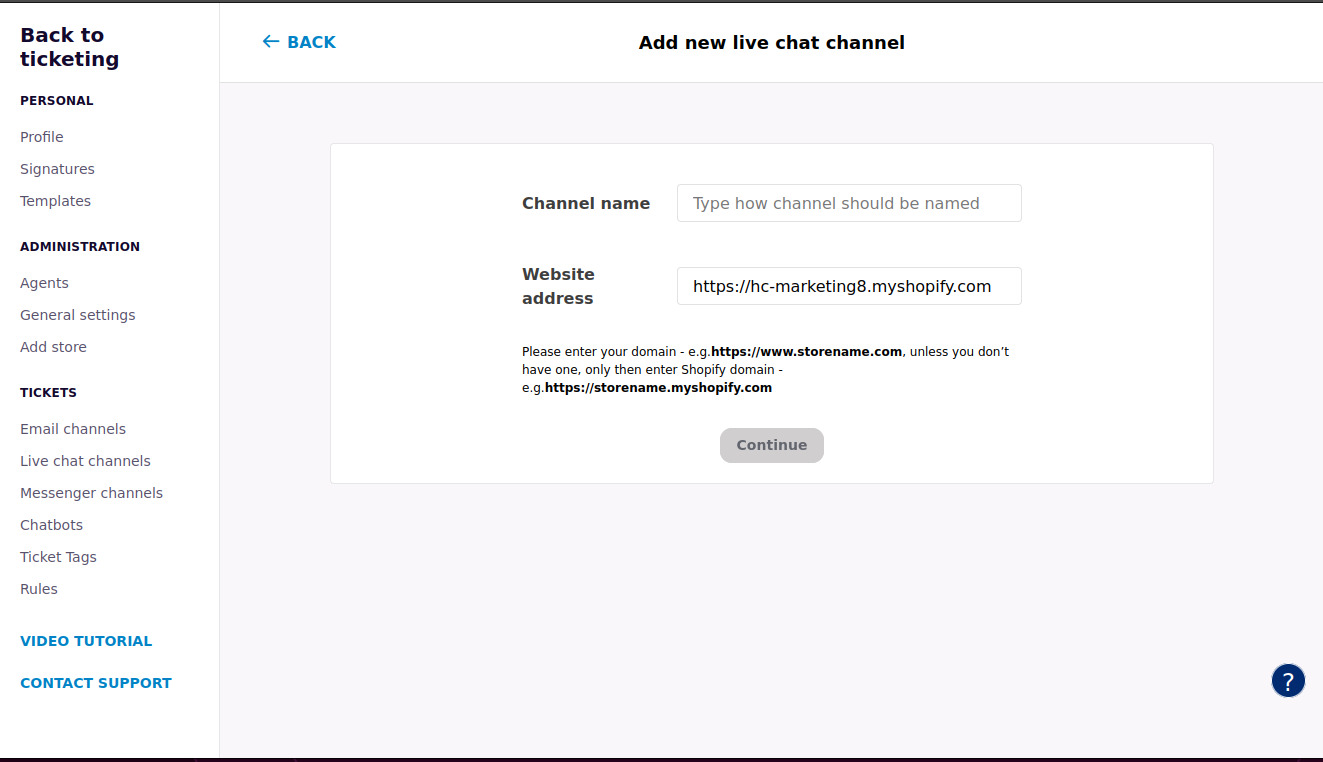
10. Live chat account
Unlimited number of live chat accounts can be created in Help Desk – for one, two or more stores - Settings > Live chat channels:
-
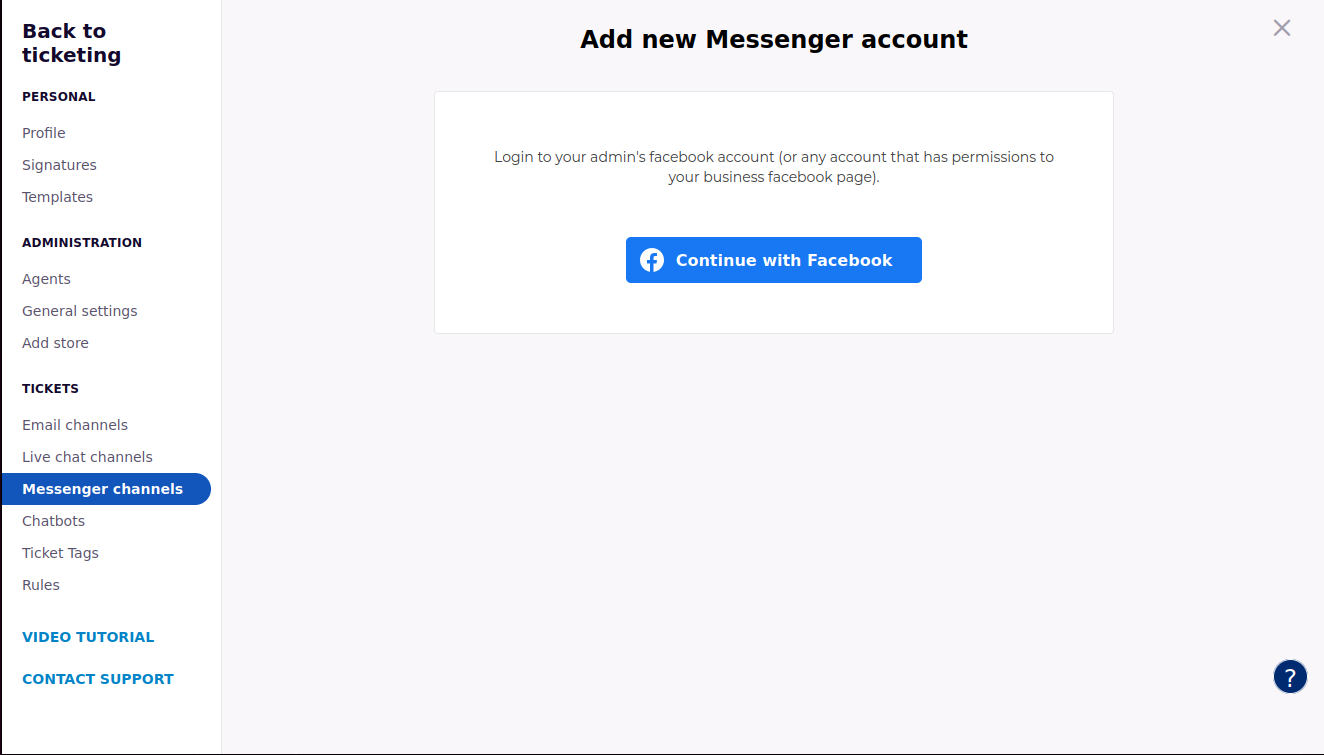
11. Messenger account
For supporting customers requests from Facebook, please add messenger account of one or more of your stores - Settings > Messenger channels:
-
12. Chatbots
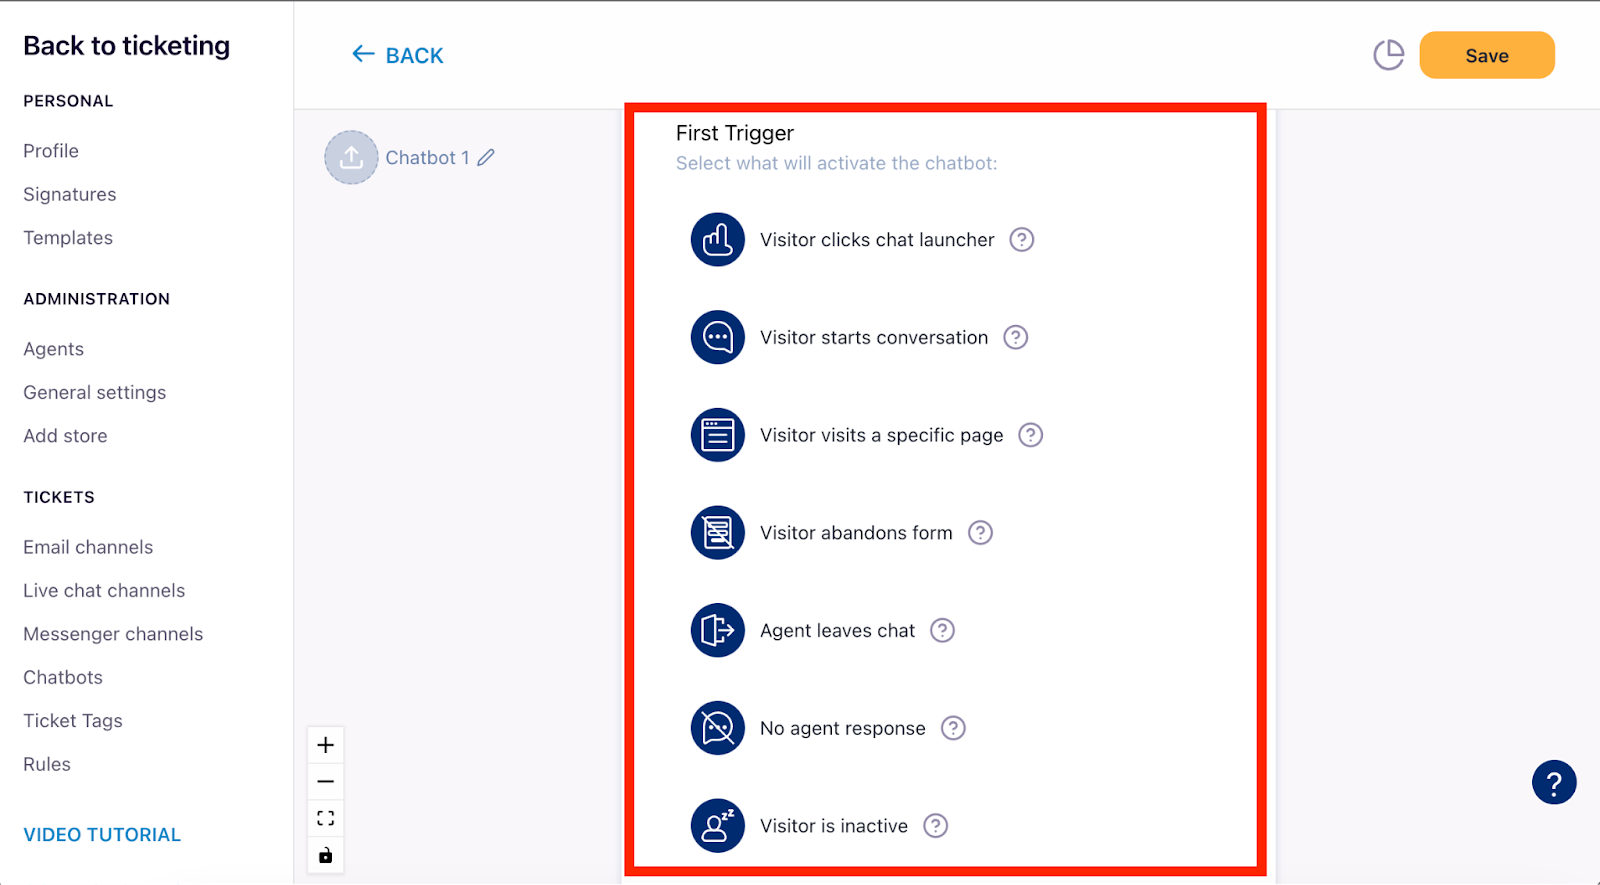
Unlimited number of chatbots can be created in Help Desk – for one, two or more stores - Settings > Chatbots:
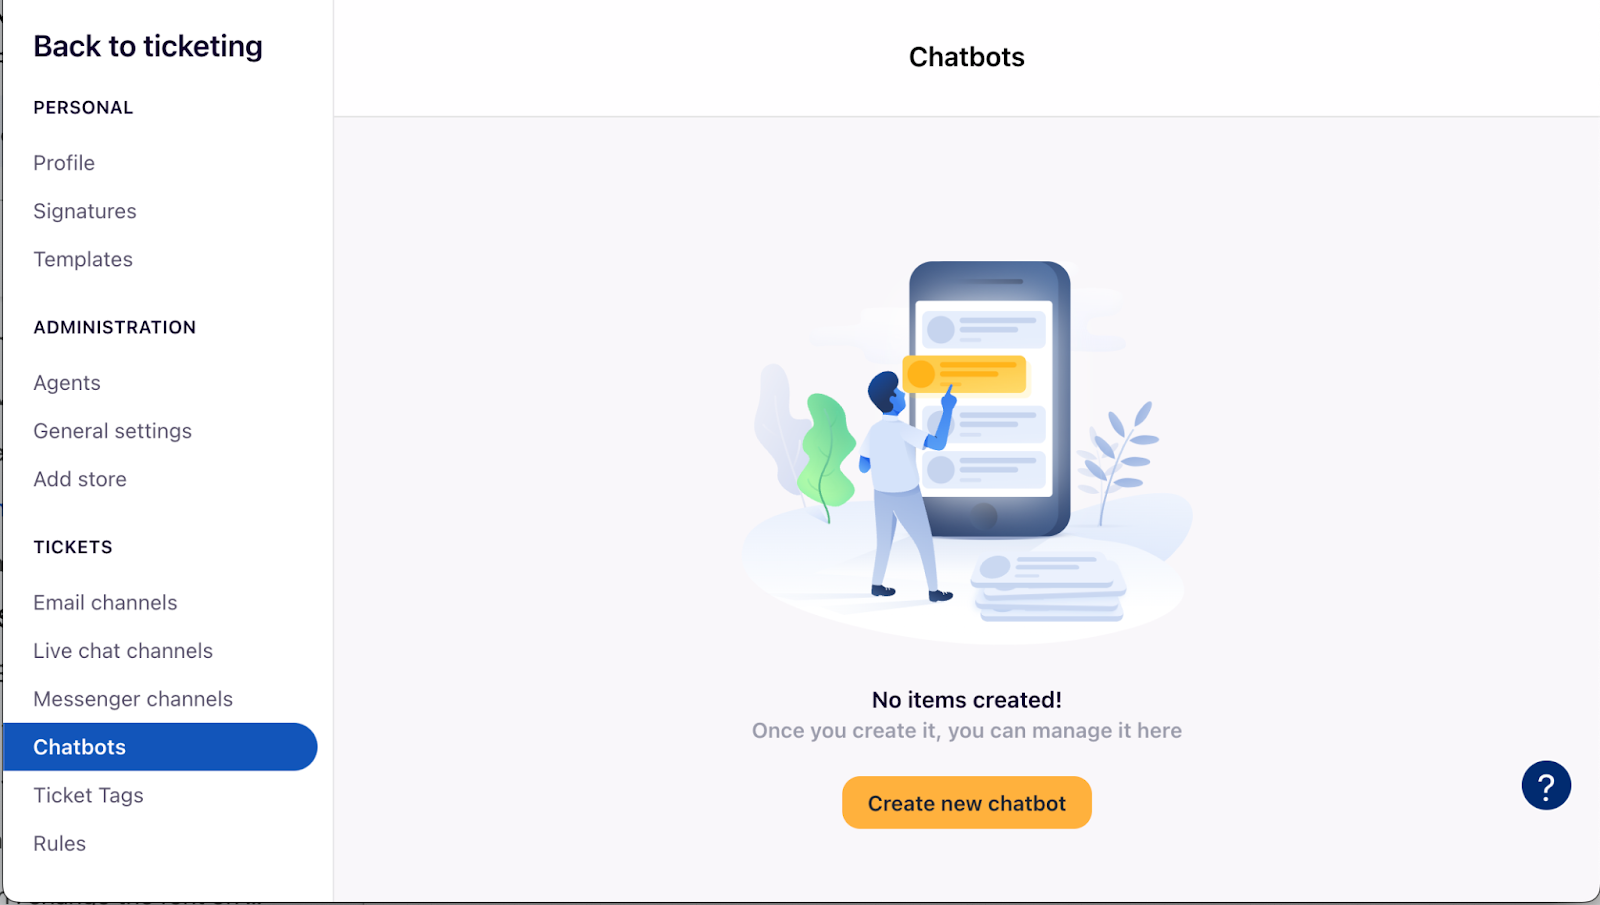
Here, you can set up triggers that will activate your chatbot:
-
13. Analytics – useful reporting insights
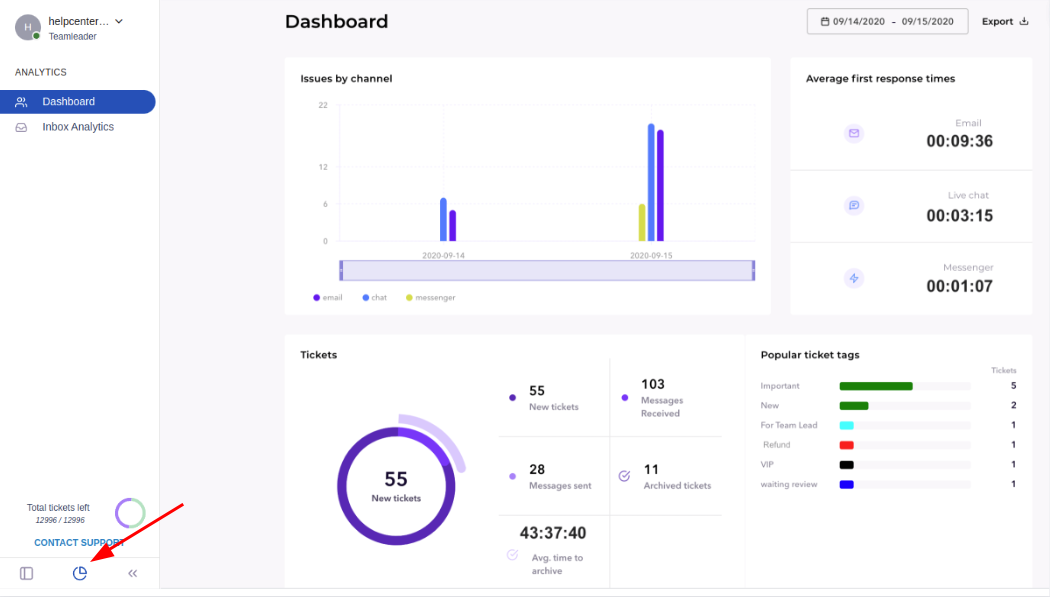
Please access Analytics from the main ticketing window - "Analytics" icon in the left bottom corner. Here you can find useful statistics about customer support activities in Help Desk system:
Dashboard:
-
Issues by channel: number of new tickets created during selected date range.
-
Average first response time.
-
Tickets:
-
New tickets: all the new tickets in specific date range: IN + OUT + all the channels (Inbox / Chat / FB Messenger).
-
Messages received: all the new IN messages within the tickets - e.g.: 1 ticket and 10 IN messages from the client.
-
Messages sent: all the new OUT messages.
-
Archived tickets within selected period.
-
Avg. time to archive: the archive times of the tickets for the selected date range.
-
Facebook Messenger ticket count resets every day at midnight.
-
-
Popular ticket tags: IN + OUT tickets with specific tags.
-
Agents: statistics about each agent activities:
-
Tickets archived:all the tickets archived by specific agent.
-
Avg. first response time:all the tickets which were assigned to specific agent.
-
Messages sent:all the OUT messages sent by specific agent.
-
Time active:counts all the time from Login to Logout.
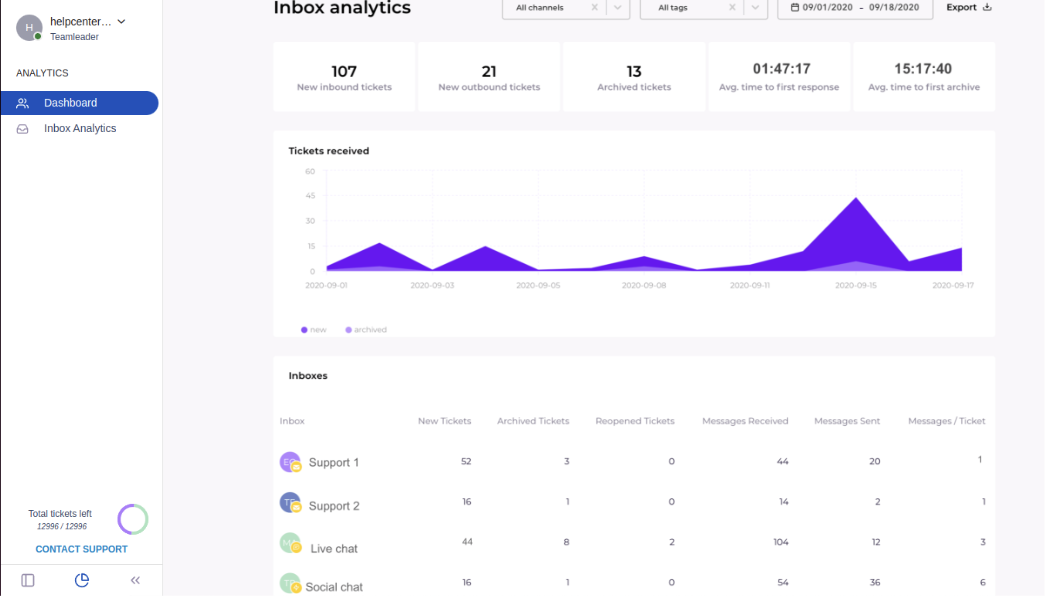
Inbox Analytics:
-
-
Overview: number of inbound, outbound and archived tickets, average first response, first archive time.
-
Tickets received: all the new and archived tickets.
-
Inboxes: new, reopened, archived IN + OUT tickets, messages per ticket.
-
New tickets: IN + OUT tickets, without auto-responses and empty chat tickets.
-
Reopened tickets: IN + OUT tickets which were reopened during the date range.
-
Archived tickets:IN + OUT tickets which were archived during the date range.
-
Messages per ticket: doesn't count auto-response messages.
-
-
Distribution of new tickets: IN + OUT tickets in different channels.
-
Agents: more detailed information about particular agent activities: number of assigned, sent, forwarded, archived tickets.
-
Assigned: counts all the tickets, that have been assigned to an agent.
-
Sent: doesn't count drafts and OUT messages with sending errors.
-
Forwarded: all the tickets which were assigned to specific agent and agent forwarded the ticket to different email.
-
Archived: counts all the tickets which are archived and assigned to specific agent.
-
Avg. Time to first response: all the tickets assigned to specific agent. Doesn't count auto-response messages.
-
Avg. time to archive:all the archived tickets assigned to specific agents. E.g.,: if received ticket on 06 02 10 am, archived on 06 02 5 pm - archive time is 7 hours. Then ticket is reopened on 06 05 and archived on 06 07 -> agent still sees the First archive time (7 hours).
-
Log in time: counts all the time from Login to Logout. Count resets at 23.59h GMT +2.
-
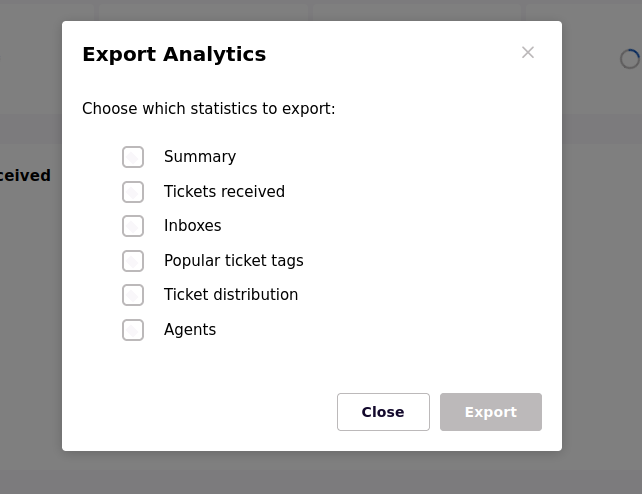
Analytics data export:
Possibility to export analytics data:
-
3. Tabs Section
-
1. Clear cache every time after making any changes.
After making any changes to your store using the HelpCenter Tabs feature, please clear your browser’s cache. Otherwise, you may not be able to see the change. The clearing of the cache helps your store load faster and with all changes visible.
How to clear the cache on your website: Windows: press CTRL + F5. MAC: press Command + Shift + R
Your website will reload automatically, and the cache will be cleared.
-
2. Why can’t I see tabs on my product pages?
Check if you have activated Tabs feature. You can activate Tabs in Tabs page.
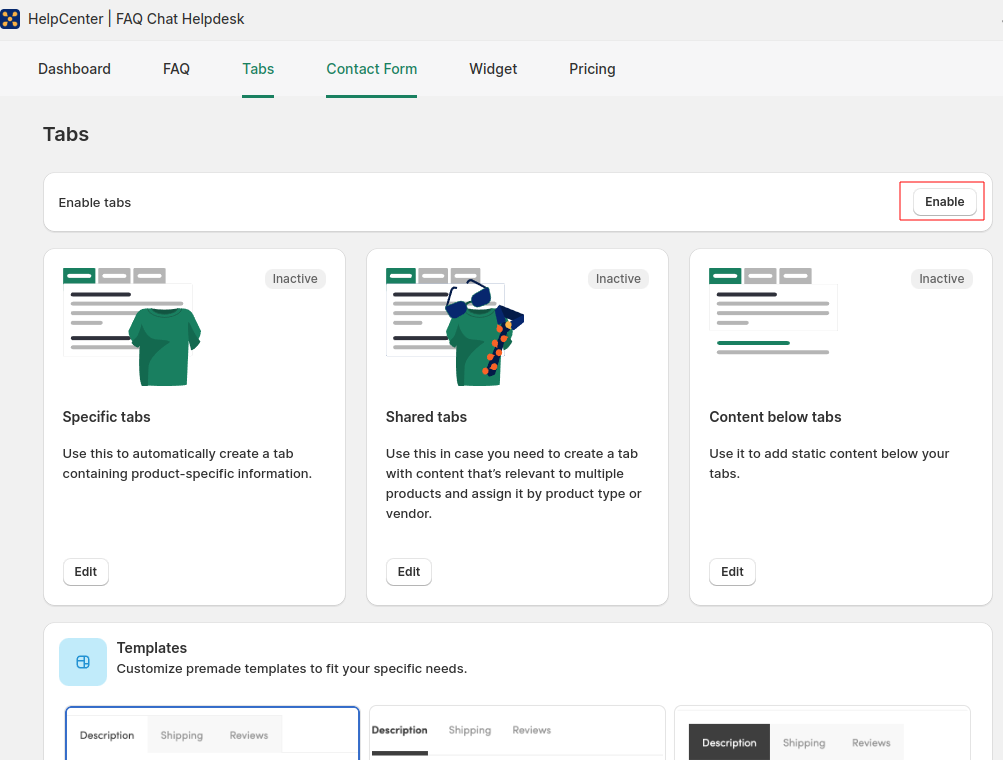
Please note, to activate your Tabs, the Tabs extension needs to be turned on.
To check this, from Shopify admin go Sales channels > Online Store > Customize:
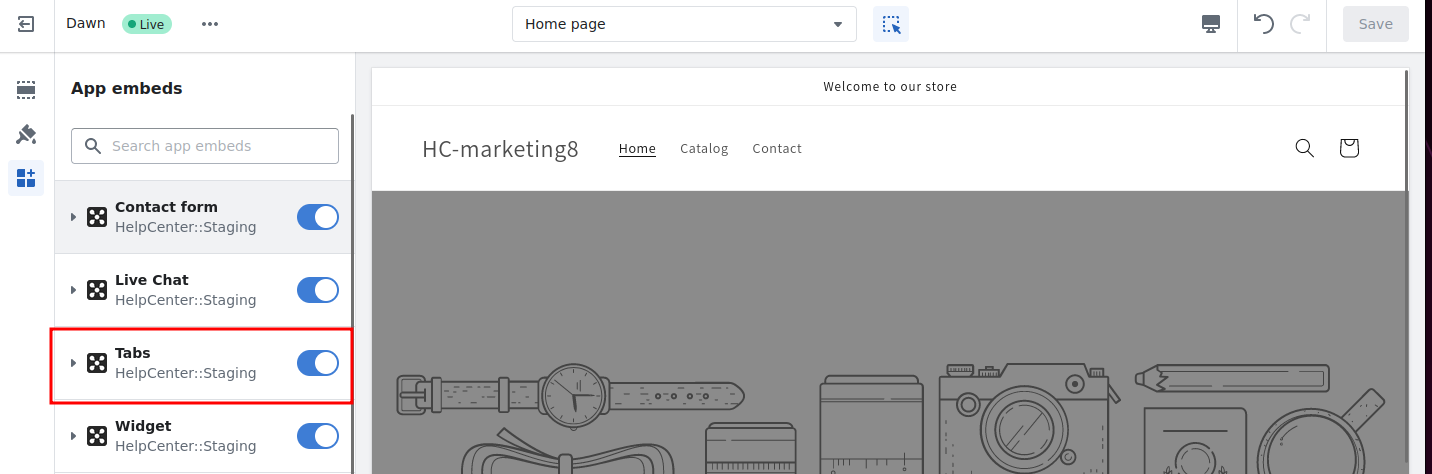
If tabs do not appear on your product pages, make sure you have cleared your browser’s cache. This is something you should do every time after updating your store. On Windows, you can clear your browser’s cache by pressing CTRL + F5. On MAC, click Command + Shift + R
If the changes were made inside the HelpCenter’s Tabs feature, clearing of the cache for 1-2 times should work. If the changes were made using Shopify (e.g. adding an H5 tag), clearing the cache might take longer and will likely require you to repeat the process.
As an alternative, you can also try a different browser to see if your tabs are visible.
Also pay attention if you are using the same heading (e.g. H5) in the Product description text and in the Tabs feature settings.
This is also expected with some custom or not as popular themes. If you have one, we recommend contacting our support, so we could fix this.
-
3. Why am I experiencing delays while loading my tabs?
HelpCenter Tabs load using Javascript which means that it first fully loads your page, and then the tabs follow. The fact that you’re experiencing a slight delay isn’t affected by the HelpCenter Tabs feature. This is simply how your Shopify theme loads our scripts.
-
4. Why are my tabs displaying vertically, not horizontally?
HelpCenter Tabs load using Javascript which means that it first fully loads your page, and then the tabs follow. The fact that you’re experiencing a slight delay isn’t affected by the HelpCenter Tabs feature. This is simply how your Shopify theme loads our scripts.
-
5. Can I change the font on my tabs?
Yes, you can change the font of your tabs by following these steps: Visit Customization Add custom CSS inside HelpCenter Tabs feature and paste this code with the font that you’d like to add:
.hc-tabs-wrapper__navigation__item {font-family: 'Teko', sans-serif}
.hc-tabs-wrapper__content {font-family: 'Teko', sans-serif}If you want to add this code directly to your current theme’s CSS file, follow these steps: Go to “Online Store”, click “Action” and then “Edit code” Find the stylesheet called style.scss.liquid and insert the following code with the code you’d like to add at the bottom of it:
.hc-tabs-wrapper__navigation__item {font-family: 'Teko', sans-serif}
.hc-tabs-wrapper__content {font-family: 'Teko', sans-serif}Reminder: Clear your browser’s cache after making any changes to your website.
-
6. Why do I see a white space above the tabs, and how can I remove it?
The white space above the tabs sometimes appears due to HTML elements, which adds more space horizontally above the product description. To fix it, there are two options:
-
Find your current theme, click "Actions" and "Edit code" Enter this text in a search bar: product-template.liquid. Along with the product description, you should see this code:
<br><br> -
Space will disappear once you delete it. Alter the margins in the app setting or remove a piece of code within your Shopify theme.
-
-
7. What to do if product pages show the wrong shared tabs?
Please check if any of your individual products aren't assigned to multiple tags, as this might be the reason for it. If that is the case, please assign those products only to tags you want this shared tab displayed, or chose other tags. You can check this in Shared tabs section.
-
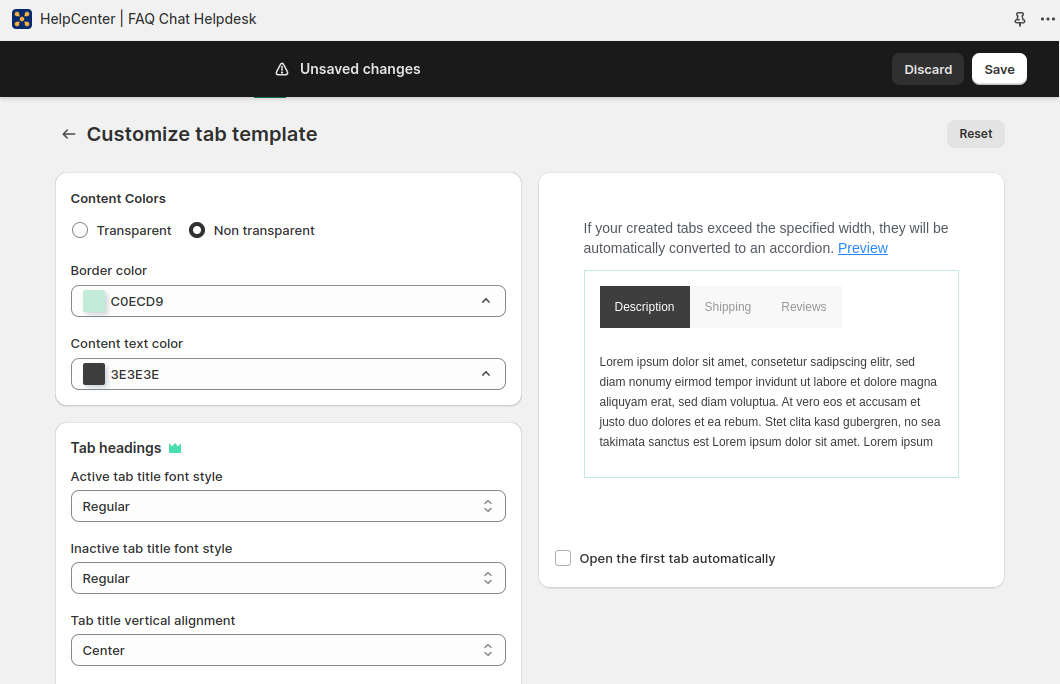
8. How can I customize my tabs?
Tabs can be customized in the Template section, select the Tab template > Save > Customize:
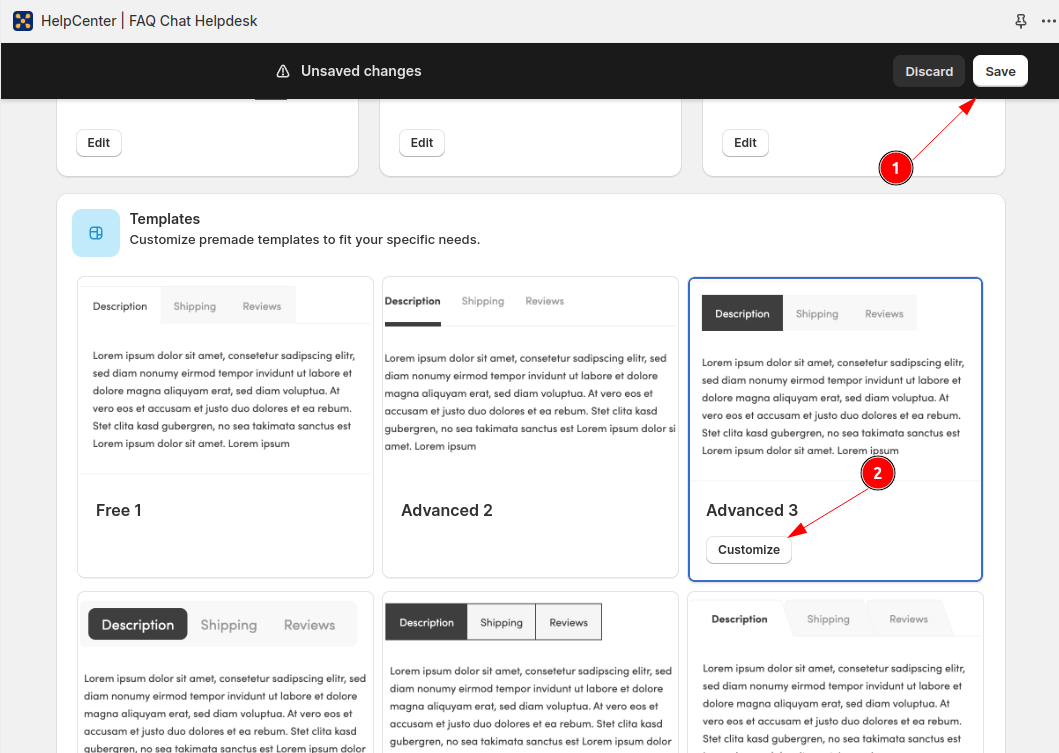
Here you can change text and background colors, borders, padding, fonts, etc. You can also preview the changes you’re about to make to be sure it’s what you want. Also, you may add your custom CSS.
-
9. Can I get different tabs on different pages?
Yes. If you want different tab for one product page, use Specific tabs function. If you want to have different tabs for a group of product pages, follow these steps: Go to Shared Tabs > Edit > Create New Tab and name it. Select the collections/categories that you want to add this tab to. In the “Applies to” section, click on “Some products” and select the product type in the drop-down menu.
-
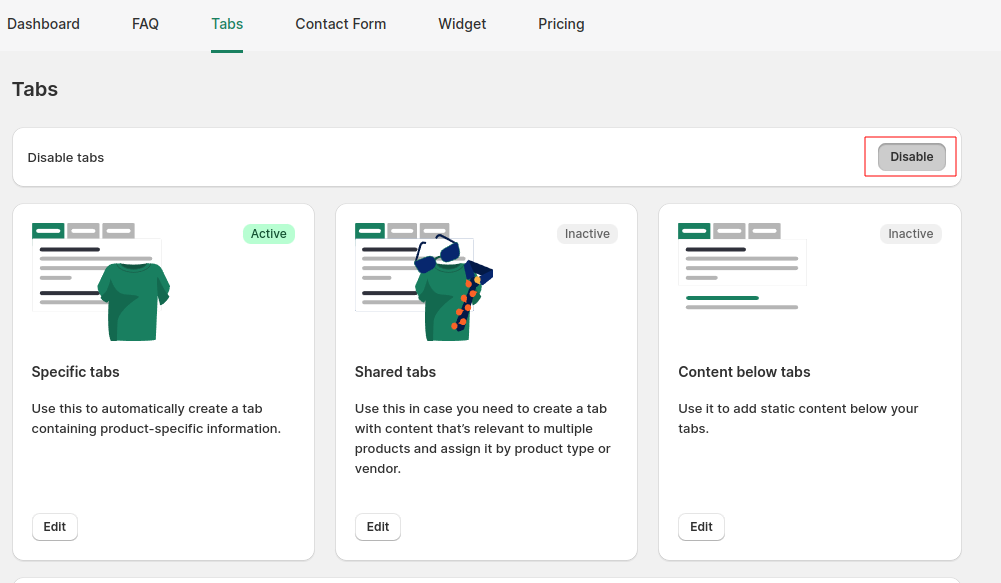
10. How to remove tabs?
If you want to remove tabs, you should deactivate tabs in the top right corner of the dashboard menu.
4. Contact Form Section
-
1. How to launch contact form?
There are a few simple steps to launch your contact form in our app:
-
First, you need to input an email address where your contact forms should be sent (you may also edit the subject of the emails you will receive from the contact form).
-
Choose the form of the contact form (embedded in the page or as a widget) and whether it should be displayed in all pages or only in some specific.
-
Choose template and style the form. Click save in the top right corner.
-
When you're happy with your contact form, you may launch it in your store by clicking the Activate button in the upper right corner. Please note, you may need to turn on Contact Form extension first.
To turn on, from Shopify admin go Sales channels > Online Store > Customize:
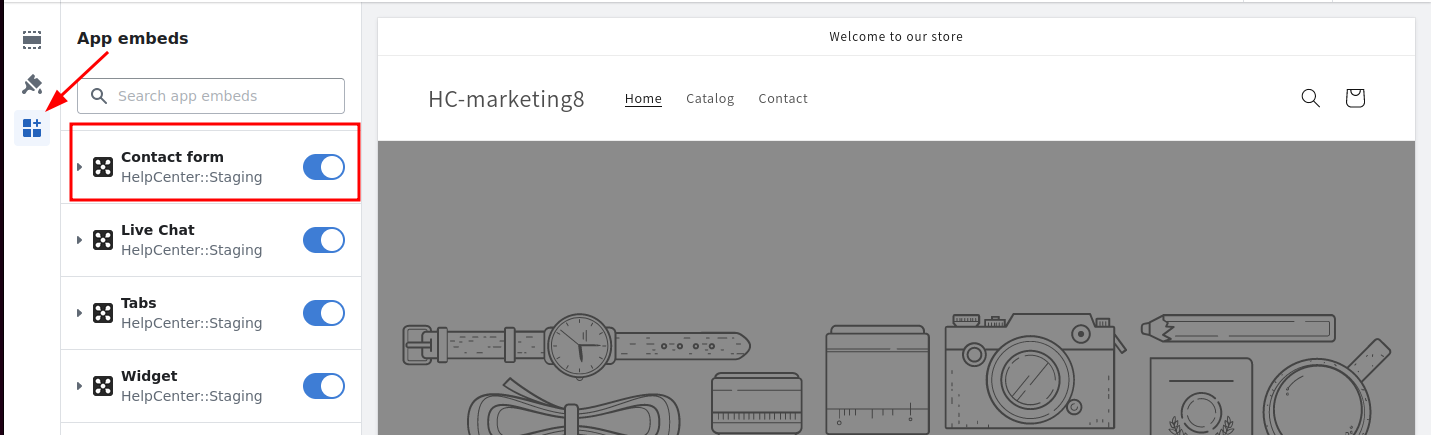
Please check the box of Contact Form extension and don't forget to click SAVE button.
After these steps, you should see a contact form on your store.
-
-
2. I do not see my changes?
How to clear the cache on your website: Windows: press CTRL + F5. MAC: press Command + Shift + R.
Your website will reload automatically, and the cache will be cleared
-
3. I do not see a contact form in my page
-
Check if you have activated the feature. You can activate your contact form by clicking the Activate button in the upper right corner.
-
Check if Contact Form extension is turned on.
-
Make sure you have cleared your browser's cache. This is something you should do every time after updating your store. On Windows, you can clear your browser's cache by pressing CTRL + F5. On MAC, click Command + Shift + R. If the changes were made inside the HelpCenter's Contact form feature, clearing of the cache for 1-2 times should work. If the changes were made using Shopify (e.g., adding an H5 tag), clearing the cache might take longer and will likely require you to repeat the process. As an alternative, you can also try a different browser to see if your Contact form is visible.
-
This is also expected with some custom or not as popular themes. If you have one, we recommend contacting our support, so we could fix this.
-
Check what form (embedded or widget) and place (top or bottom of the page and all pages or specific pages) you have chosen and if you are looking at the same page/place.
-
-
4. Why am I experiencing delays while loading my Contact form?
HelpCenter Contact Form load using Javascript which means that it first fully loads your page, and then the contact form follows. The fact that you're experiencing a slight delay isn't affected by the HelpCenter app. This is simply how your Shopify theme loads our scripts.
-
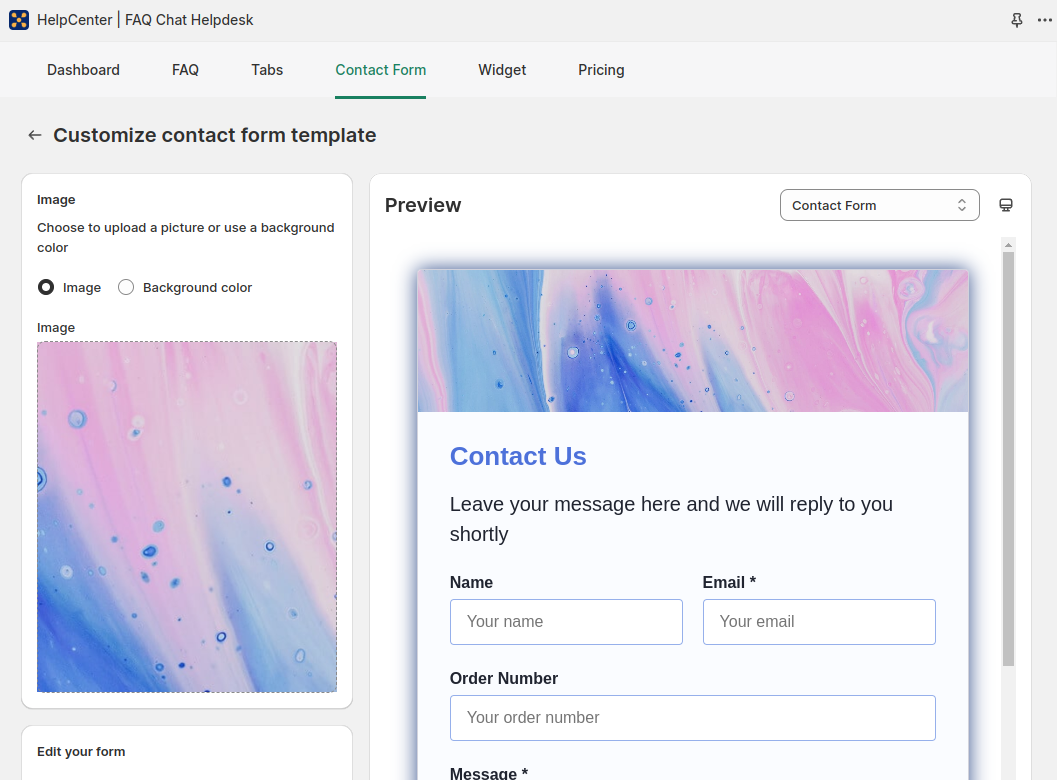
5. How can I customize my Contact form?
The contact form can be customized by using our layout editor in the Template section: Please select the Contact form template, click Save in the upper right corner, then click Customize.
Here you can change text and background colors, borders, padding, add image and new elements. You can also preview the changes you’re about to make to be sure it’s what you want.
-
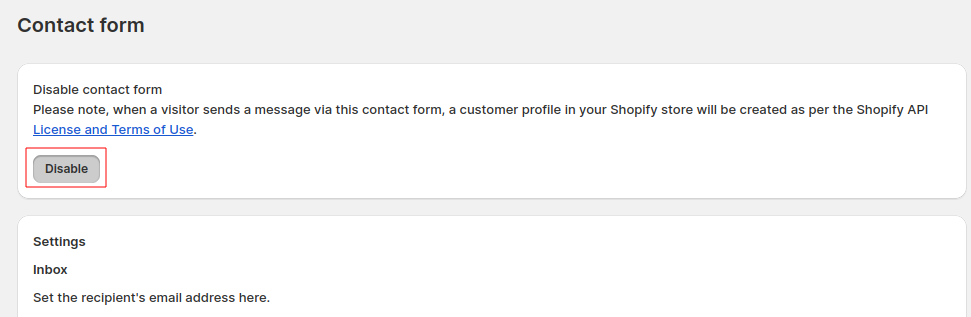
6. How to remove the contact form?
If you want to remove contact form, you should deactivate tabs in the top right corner of the dashboard menu:
5. Widget Section
-
1. How to start using Widget?
There are a few simple steps to launch your HelpCenter widget:
-
Firstly, you need to have at least one category published on your FAQ page or have an email address added to your contact form settings.
-
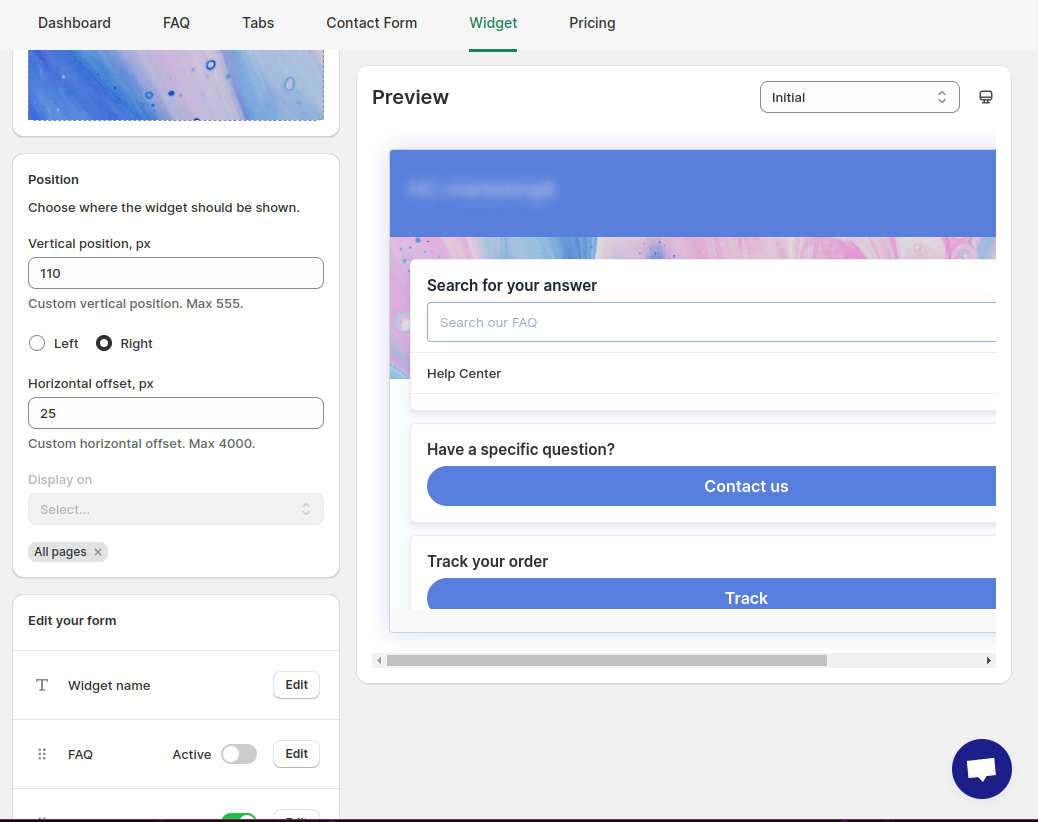
Choose the template, click Save in the upper right corner, then Customize.
-
In customize widget templates section select the content that you want to display (FAQ, Contact form, order tracking, live chat, or all of them) in your widget and where the widget will be displayed (It can be all the pages or only the selected ones in your store):
-
Once you’re happy with the results from the preview, you may launch the widget by clicking the Activate button:
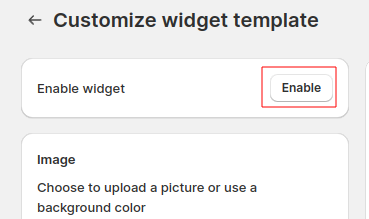
When enabling the Widget for the first time, you will be redirected to your theme setting to enable its extension.
To check, from Shopify admin go Sales channels > Online Store > Customize:
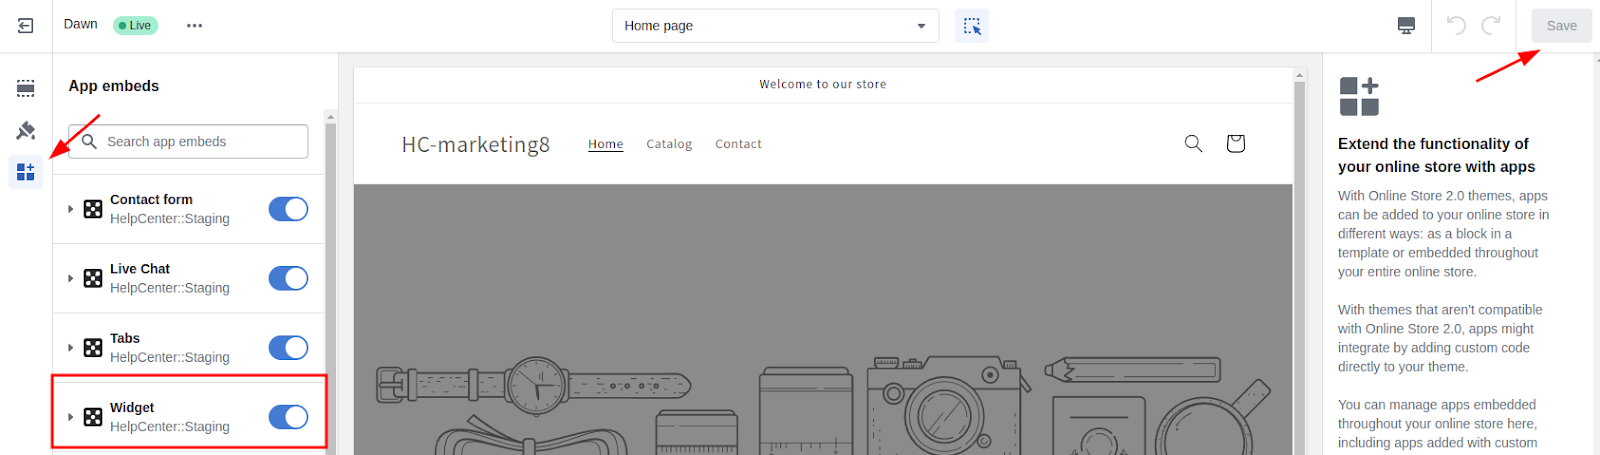
Make sure that the Widget extension is enabled and click the SAVE button.
After these steps, you should see the HelpCenter widget on your store.
-
-
2. I do not see the Widget in my store
-
Check if you have activated the feature. You can activate your Widget by clicking the Activate button.
-
Check if the Widget extension is enabled in your theme settings.
-
Make sure you have cleared your browser’s cache. On Windows, you can clear your browser’s cache by pressing CTRL + SHIFT + R. On MAC, click Command (⌘) + SHIFT + R.
-
This is also expected with some custom or not as popular themes. If you have one, we recommend contacting our support, so that we could fix this.
-
Check the pages where you selected to display your widget and if you are looking on the same page.
-
-
3. Why am I experiencing delays while loading my Widget?
HelpCenter Widget loads using Javascript which means that it first fully loads your page, and then the Widget follows. The fact that you’re experiencing a slight delay isn’t affected by the HelpCenter app. This is how your Shopify theme loads our scripts.
-
4. Can I customize my widget?
The Widget can be customized by using our layout editor in the Widget template section. Select the template > Save> Customize. Here, you can change text and background colors, and borders, customize button and main body, etc. You can also preview the changes you’re about to make to be sure it’s what you want.
Please note that in the initial widget preview, all the FAQ, contact form, and order tracking blocks will be visible.
-
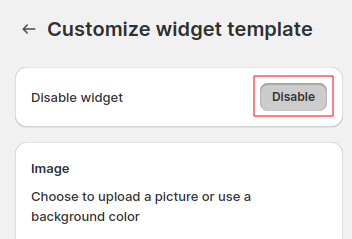
5. How can I remove the Widget from my store?
If you want to remove the widget, you should deactivate it in the dashboard menu: