When running an online business, it’s essential to provide customers with a quick and easy way to reach out to you anytime they need. Whether they just want to learn more about your products, face technical difficulties, or can't find the information they need, they shouldn't be wandering around your store just to be able to connect.
Hence, we are more than happy to introduce you to HelpCenter’s new contact form that you can easily add to any page of your website, enabling visitors to send you a message in just a few simple steps.
Let us show you how you can do it!
What are the benefits of a contact form on your website?
- Generate more leads. Making a contact form available on your website can encourage new visitors to ask questions. This way, if you play your cards right, you can turn them into customers.
- Customers can contact you without leaving your store, meaning that getting in touch becomes quick and easy.
- Collect all the necessary information. You can include all the necessary fields in your contact form, like an email address or order ID, to learn the information that's crucial for the successful resolution of the inquiry.
- Avoid spam. Enabling a contact form instead of putting your email address on your website will reduce the chances of spammers flooding your inbox with junk mail.
- Another way to offer support. The variety of different communication channels will only make your customers happier – they will appreciate another, convenient way to get in touch.
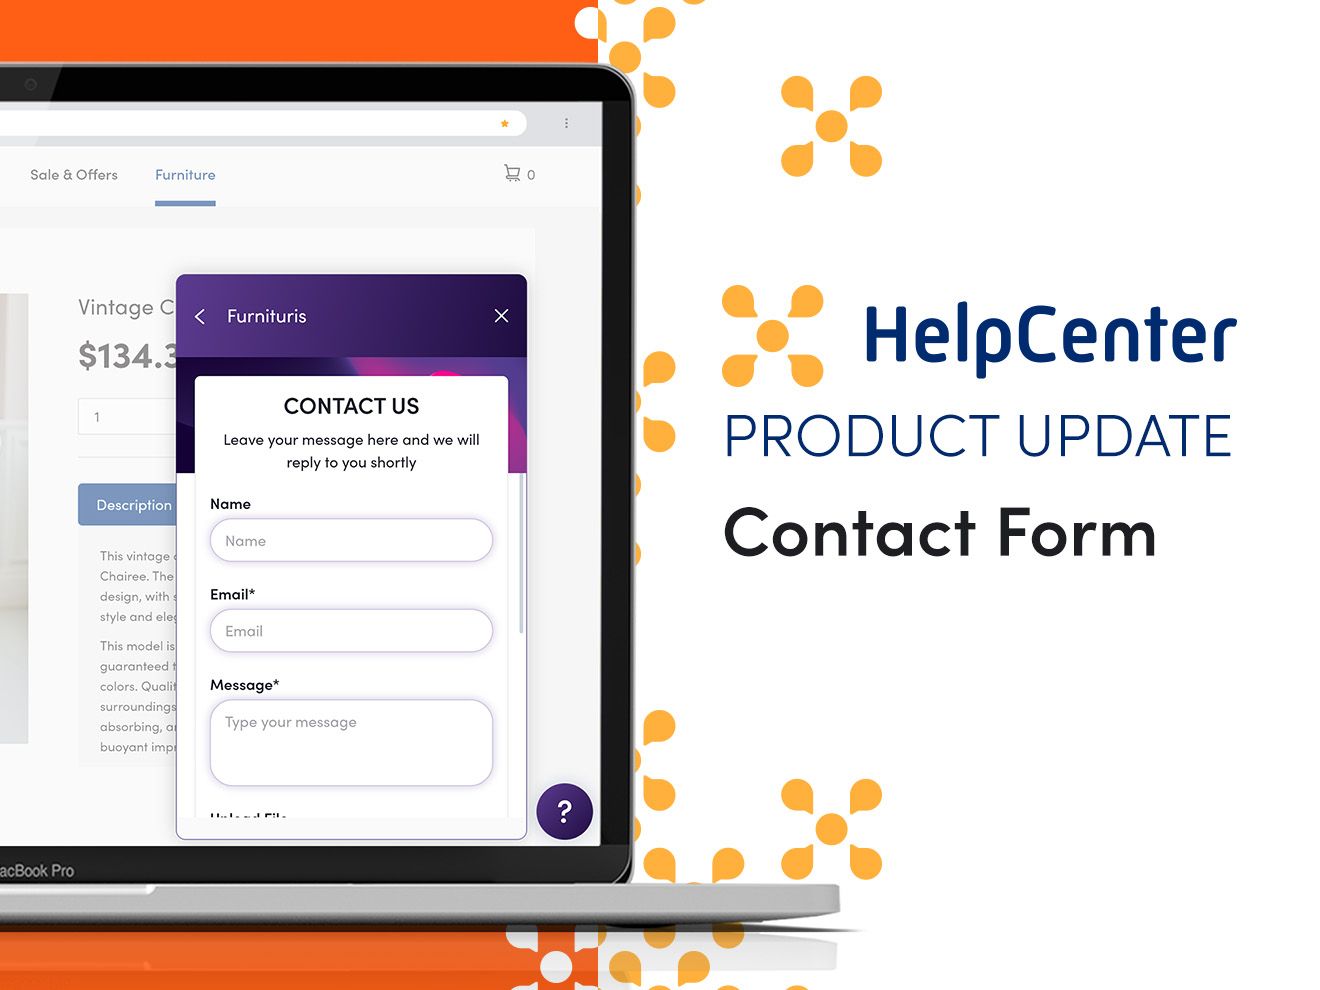
How will the HelpCenter’s contact form look on your online store?
You can choose one of two ways how and where to display the contact form on your website:
- Widget (can appear on any page on your store) – a visitor clicks on the contact icon on your website to open the form.
- Embedded on the page – you can add the contact form to be present on the FAQ or any other specific page. You can also create a separate page on your website and put the contact form there.
What’s great about our new contact form?
- You have the freedom to choose how the contact form will be displayed on your store – whichever feels more convenient.
- You have full control over the elements to include in your contact form.
- Our contact form allows customers to upload files in various formats for a clearer view of the situation (PDF, PNG, GIF, JPEG, MOV, DOCX, and more).
- You can edit elements (insert title, input names, decide about alignment (center, left, right), the width (1/3, 1/2, or full width)) to better meet your needs.
- You can use a variety of customization options to adjust the looks of the contact form to your store design: choose from many different templates, change the background, fonts, font sizes and colors, upload background image, etc.
How to add a contact form to your Shopify store?
Every HelpCenter user (free and paid plans) can add a contact form to their websites following these steps:
➡️ Open your HelpCenter app-admin page, go to Products and choose Contact From & Widget.
➡️ Fill in other necessary fields:
- Enter your email address (where all the inquiries will be sent) and the subject line of the email you’ll receive. Click Save.
- Choose where and how you’d like to show the contact form on your website – either as a widget or embedded (on all pages or a specific page).
- Select the elements required for the form: title, description, name, email, message & buttons, etc. You can choose from pre-made elements or add your own by clicking “Add element”. Click “Save” to save the changes.
➡️ Customize your contact form to match your website design: choose the template, edit the width, background color, shadows, font size and colors, buttons, add a background image (where possible), and many more. Once you’re happy with your form, click “Save”.
➡️ To activate your contact form, slide the toggle switch on the top right corner to Active - you’ll be then asked to activate a contact form extension. Once you click Activate, you’ll be transferred to Shopify theme settings.
➡️ In the App embeds, you’ll notice that the contact form is enabled. Now, click Save on the top right corner to confirm.
➡️ Go back to the contact form settings and slide the toggle switch to Active once again. Your contact form is now live!
You can also see how to activate your contact form step-by-step in the video below:
Please note: If you’ve been using templates with buttons to an old contact form, your old contact form will be updated automatically.


